P4G Vita
This guide was written by Dexxtrip on Gamebanana / @bonq.com on Discord.
This guide covers the process of porting music mods from Persona 4 Golden on PC to Vita.
Table of contents
Required Tools
| Tool | Usage |
|---|---|
| At9tool | Needed for converting music files to Vita format. |
| Sonic Audio Tools | Needed for extracting Vita .ACB and .AWB. |
| foobar2000 | Needed for listening and converting PC audio files. |
| vgmstream | Required addon for foobar2000 that enables listening to Vita audio files. |
| Completely unpacked base game | Needed for extracting the ACB and AWB files. |
Getting started
First thing you need to do is find a mod that is applicable. Not every mod is going to be applicable as some require the use of BGME, which doesn’t exist for Vita. Check your mod page’s requirements before downloading.
I’ll be porting True Story over Time to Make History by wxnder to demonstrate.
Porting sounds
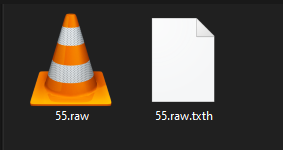
Download the mod of your choosing and navigate through the folders until you find the .raw file. You should find a .txth file next to it, like this:
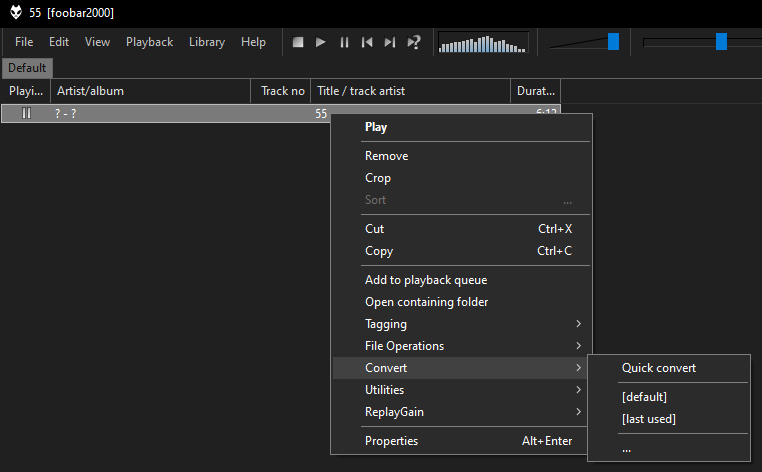
Now, open foobar2000 and drag the .raw file inside. Assuming you installed vgmstream properly, the file should open properly and play like it’s supposed to.
Take the time to preview the song to check you have the right one.
Next, right click the file and click Convert then Quick Convert, then select WAV as your export option.
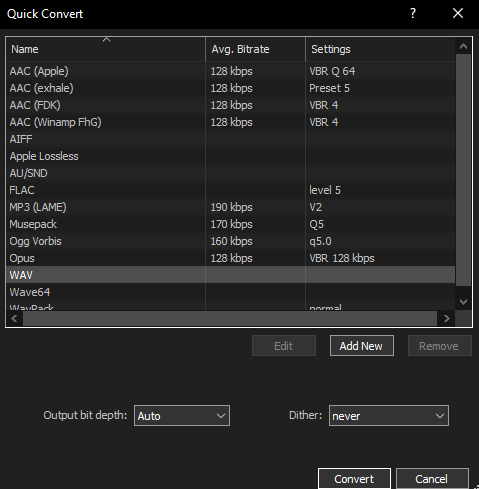
Save the file next to the .raw file.
Open the .txth file in a text editor.
Look at the txth files contents and look for the loop_start_sample value as well as the loop_end_sample value, these are the numbers we’re going to plug into at9tool to decide the loop of our AT9 file.
Now, open up a command prompt next to AT9tool.
Type in a command like this into the command prompt:
at9tool -e -br 144 -loop # # (path to wav) (path to output at9)
Replace the first # with the loop start value, and replace the second # with the loop end value. After that, drag the wav file in, press space, then drag the wav file in again but change the extension to .at9.
Your command should look something like this:

Let it output the at9 file, this can take a few seconds.
Next, drag your newly generated AT9 file into foobar2000 to check for any issues. If all is good, let’s move onto replacing the sound file.
Replacing sound files
Due to a limitation in Aemulus’s merging, we’re unable to merge multiple sound mods together natively, instead you have to repack the entire ACB and AWB with the changed tracks.
Now would be a good time to collect multiple sound mods together if you’re interested in making this for yourself.
Next, navigate to your extracted base game in this path, sound/adx2/bgm.
Inside you’ll find your ACB and AWB files.
Now, go back to your extracted Sonic Audio Tools folder and drag and drop the .ACB file over AcbEditor.exe, this will unpack your sound files in AT9 format.
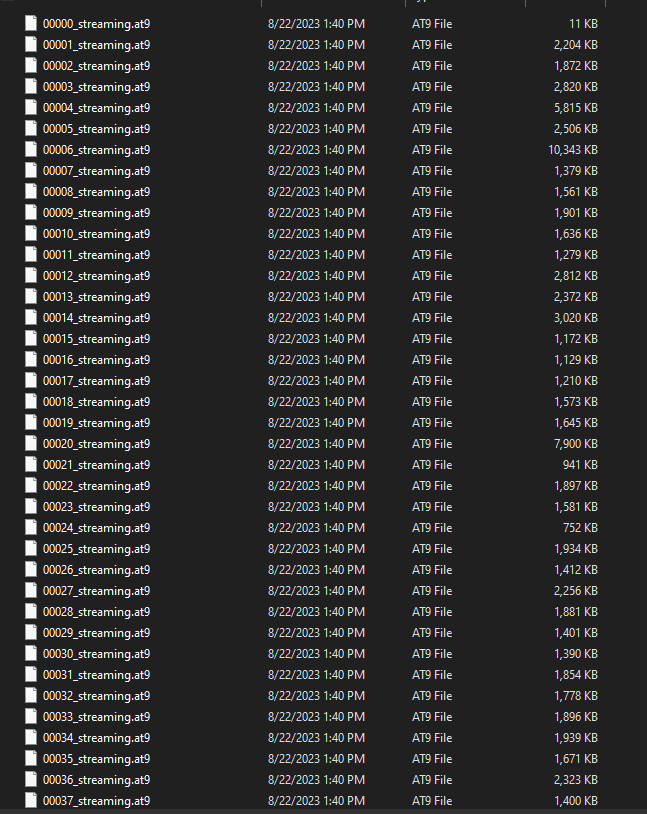
Inside pf the newly extracted folder are all of the AT9 files for the base game. You don’t want to permanently mess with these in the off chance you’d be interested in doing other sound mods later, so it’s a safe idea to make a copy of the ACB, AWB, and folder to another location.
Once you have made a copy of your sound files in another location, let’s replace the sound file with the track you just made.
Typically, sound file ID numbers on PC are one number ahead, so in our case, we’d want to replace 00054_streaming.at9 with our 55.at9 file. Now this isn’t always the case, so make sure you listen to the files in foobar2000 before continuing.
Once you’ve confirmed that they’re a match, overwrite the file in the snd00_bgm folder.
Next, we need to repack the ACB files with the changes, so go back to the Sonic Audio Tools folder and drag the snd00_bgm folder over AcbEditor.exe.
This will save your changes back into the new ACB file.
Once it’s generated. make an Aemulus package with the path matching where you got the file from and build.
Your path should look like this:

Once in game, test where the song plays and once you’ve confirmed it works, congrats! You’ve successfully ported a sound mod to Persona 4 Golden on Vita.
In the next section, we’ll troubleshoot possible issues you may have faced.
Troubleshooting
- AT9Tool is saying “not supported param”
- This is actually several possible things wrong with your WAV file. AT9Tool can be very picky about specific qualities of audio files. If your file isn’t in stereo, or isn’t a standard polling rate like 44100, then you’ll get this issue. You can easily fix both of these issues in Audacity by adjusting the track. For the stereo audio issue, you can duplicate the track twice, and then set each one to come out of either ear, then export again, Audacity will automatically merge down and output a stereo audio file. For the rate issue, you can right click the audio track, select rate, then choose one of the standard rates listed.
- The audio track number is too high / I can’t find a matching number
- I’m lumping these both together because they’re typical of the same issue, your mod requires BGME. BGME mods are able to add new tracks to the game and not replace old ones, this isn’t really possible on Vita. If you’re lucky, the mod could just add new tracks that are supposed to entirely replace old ones, in which case you can just point that audio file to the original track in the base game. If it’s supposed to play in a specific battle, it’s definitely not possible.
- I can’t seem to locate the BGM files at the path you listed.
- You need to have a completely unpacked base game to find the file, as Aemulus doesn’t extract those files. You can go here to find out how to extract the base files. You should already have a decrypted data.cpk from doing the modding process.