P3F
P3P
P4G
P4G Vita
P5R
Table of contents
Tools You’ll Need
- Phos Music Manager
- AtomEncd
- P5R ADX encryption script (if editing P5R audio!)
- adx-p5r-pc.ini (for usage with Phos Music Manager)
- Decrypt_P5R_ADX.zip (for usage with AtomEncd)
- Sonic Audio Tools (if manually unpacking/repacking AWB for P4G and P5R)
Replacing Audio
There are two main ways to replace audio in Persona games.
- Phos Music Manager is a music manager designed to simplify music replacement or addition in Persona 3 Portable (PC), Persona 4 Golden (PC x64), and Persona 5 Royal (PC). It automatically handles all steps needed to encode and export music.
- If replacing non music files and/or if you would rather manually replace audio files, AtomEncd should be used instead.
-
More detailed documentation on the Phos Music Manager can be found here.
Phos Music Manager contains boss name spoilers on its game specific pages. Proceed with caution if you have not finished the games yet.
Getting Started
When booting up the program, you will be brought to the Home menu, which shows you preset projects for P4G/P5R/P3P, as well as any projects you may have saved.
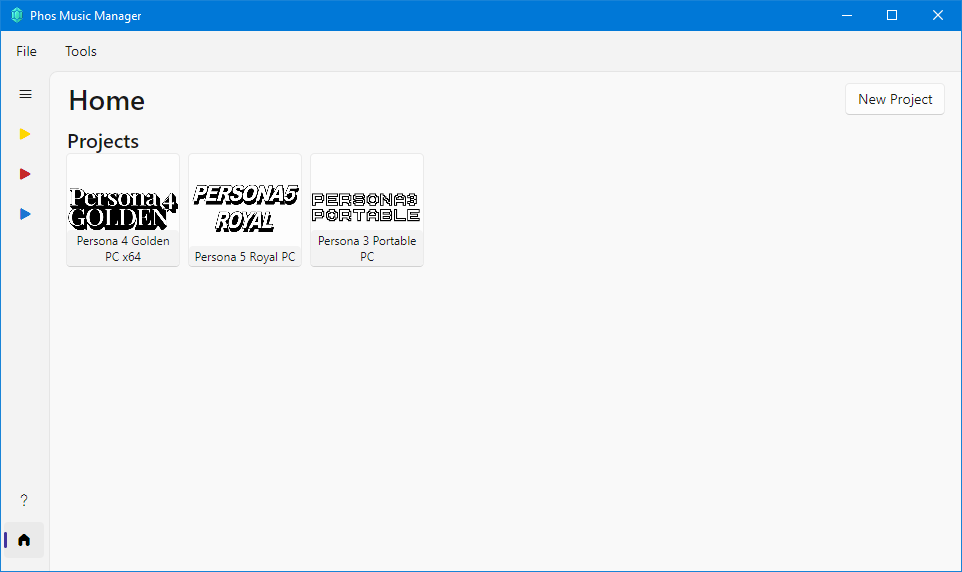
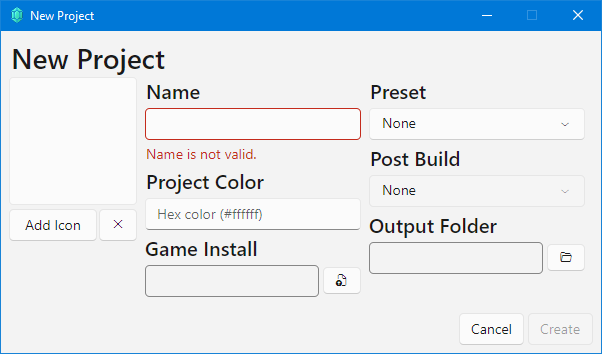
Click on New Project in the top right or in File -> New Project to create a new project. Choose a desired name, icon, and project color. Under Preset, select the game whose music files you wish to edit. Set Output Folder to your desired output folder.
P5R ADX Encryption
This step is only necessary for P5R audio editing. If you are editing P3P or P4G audio, skip this step.
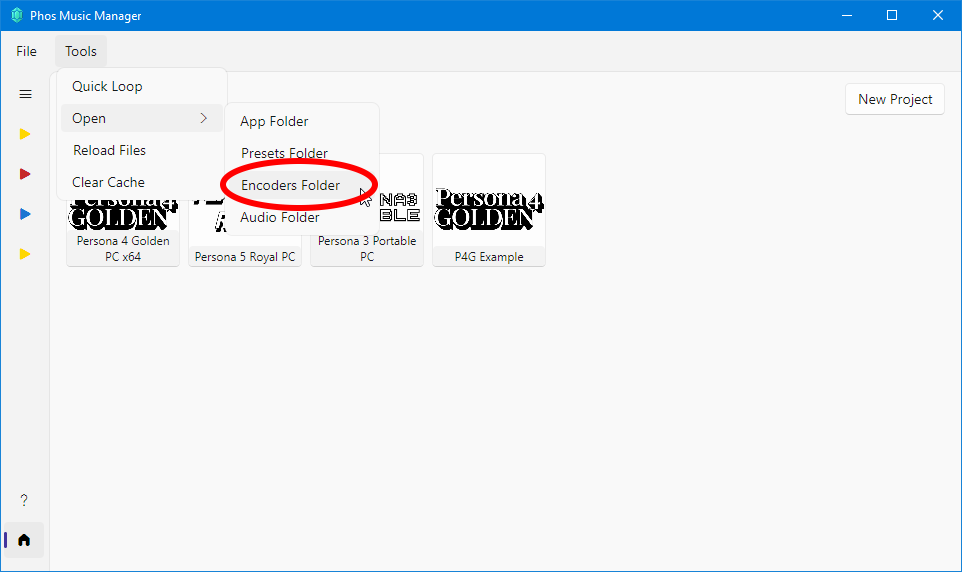
Persona 5 Royal (PC) uses encrypted ADX audio. To properly encode P5R audio, we need to add a special encoder to create ADX files specific for the game. click on Tools -> Open -> Encoders Folder.
Download adx-p5r-pc.ini here and save it to the directory that was just opened. Alternatively, create a new text file named adx-p5r-pc.ini and paste the following into it:
name=ADX (Persona 5 Royal PC)
out_container_format=adx
key_code=9923540143823782
Then click on Tools -> Reload to reload this new encoder option.
Music Replacement
To replace a song, select the song you want to change from the list and click on the
Select file...button under Replacement. Then, select your desired audio file replacement.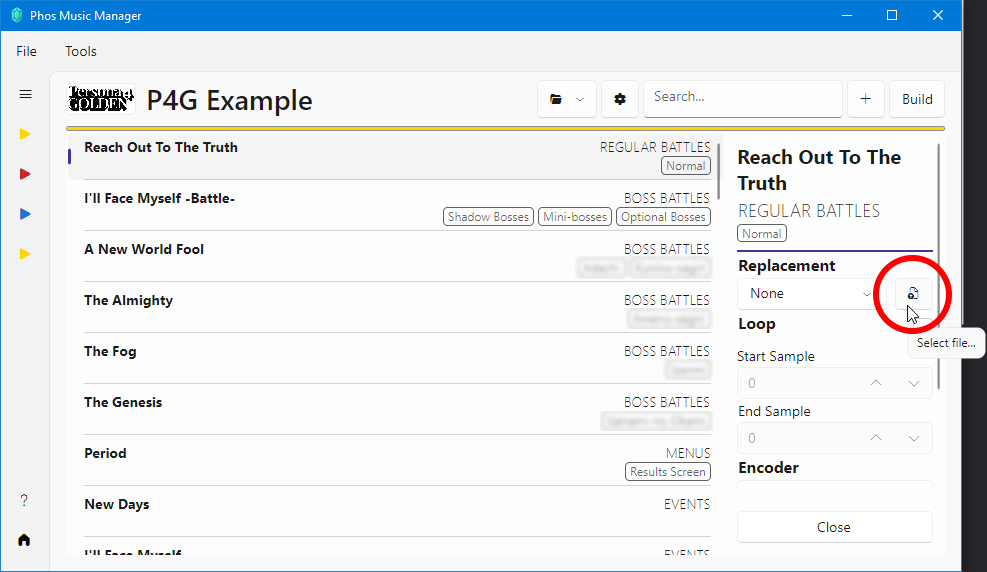
Set your start and end loop points in the Start Sample and End Sample boxes. More information on this can be found in the Audio Editing and Formatting page.
Set the Encoder to the correct option for the game whose audio you are replacing. This is as follows:
- P4G: HCA
- P5R: ADX (Persona 5 Royal PC)
- P3P: ADX
If you do not select the ADX encoder specific to P5R when replacing P5R music, your files will not encode properly and will not work correctly in-game! Make sure to set up P5R ADX encryption here!
Exporting Music
To export your changes, click on the Build button.
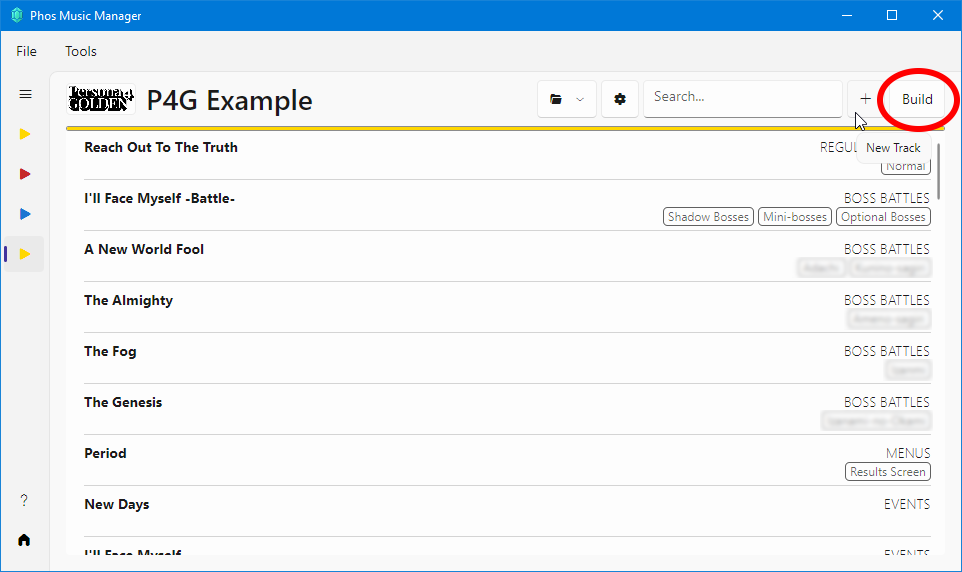
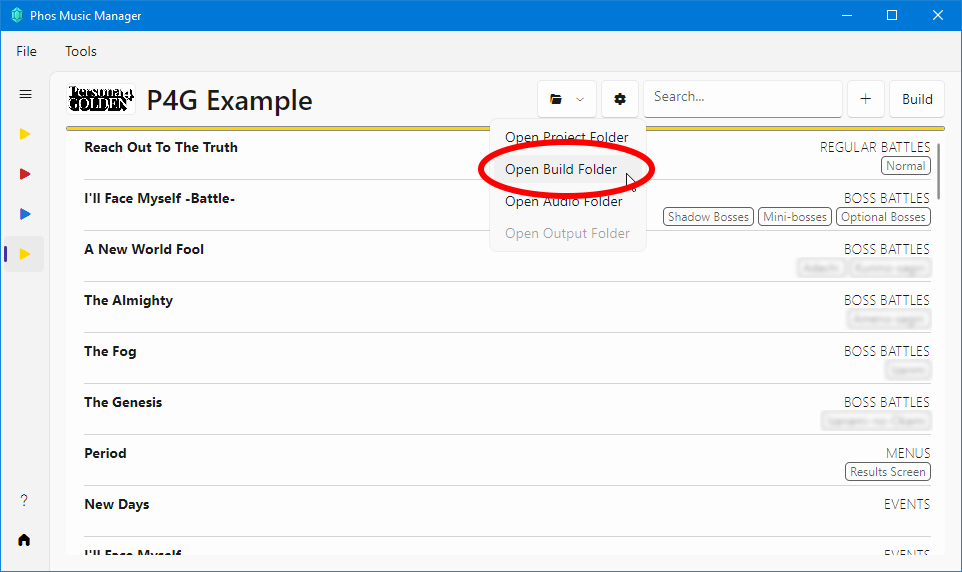
Your files will be exported to the output folder you set when creating the project. If you don’t remember where this was or if you did not set an output folder, you can click on the Open Build Folder under the folder dropdown to access your completed files.
Each game has its audio files exported differently to reflect their different file structures.
-
Files will be exported to
FEmulator/AWB/snd00_bgm.awb. PlaceFEmulatorin the root of your mod folder. -
Files will be exported to
FEmulator/AWB/BGM.AWB. PlaceFEmulatorin the root of your mod folder. -
Files will be exported to
P5REssentials\CPK\Phos Music Manager\data\sound\bgm. PlaceP5REssentialsin the root of your mod folder.
-
Encoding Audio With AtomEncd
If you want to encode your audio manually, AtomEncd can be used to encode the audio files for a given game. Note that this must be used if doing any audio edits unrelated to music.
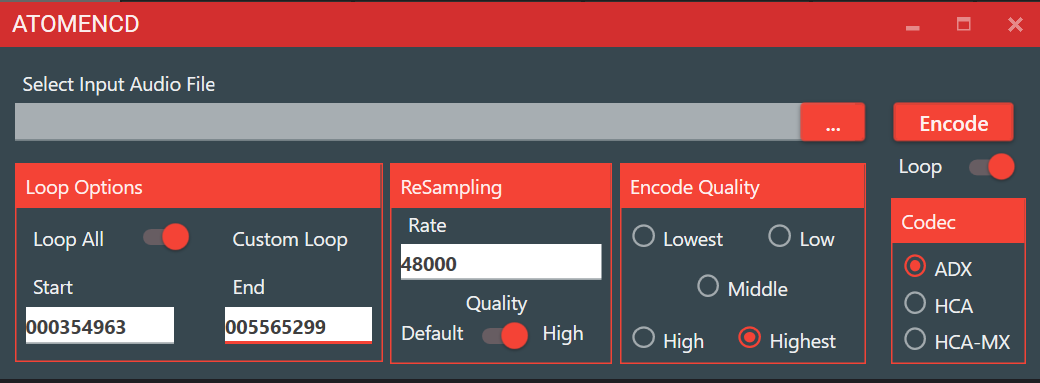
Select your desired audio file by clicking on the
...button to the left of the Encode button. If looping is desired (used for music, ambient noise, and other sounds that play continuously), enable looping by clicking the Loop switch below the Encode button. Under Loop Options, set the switch to Custom Loop, then enter the Start and End points you found earlier (no commas). Additionally, set Quality to High, Encode Quality to Highest, and the codec as follows:- P3F, P3P, P5R: ADX
- P4G: HCA
Then click Encode and save your encoded audio file with a desired name and location. Note that you need to append the file extension (.ADX or .HCA) in order for the file to function properly.
P5R ADX Encryption (Manual)
This step is only necessary for P5R audio editing. If you are editing P3P or P4G audio, skip this step.
If you do not perform this step when replacing P5R audio, your files will not encode properly and will not work correctly in-game!
P5R ADXs are encrypted, so an extra step is required to make your new audio file work ingame. Put your new ADX file in your Decrypt_P5R_ADX folder, navigate to the folder in command line, and run:
commands for command prompt. make this section a little more detailed.
-
cmd /c "for %f in (*.adx) do vgaudiocli.exe %~nf.adx %~nf_enc.adx --keycode 9923540143823782" $enc_adxs = Get-ChildItem .\*enc.adx* -recurse foreach ($enc_adx in $enc_adxs){ $stream = [System.IO.File]::ReadAllBytes($enc_adx) $stream[19] = 0x09 [System.IO.File]::WriteAllBytes($enc_adx, $stream) } -
wine cmd /c "for %f in (*.adx) do vgaudiocli.exe  %~nf.adx %~nf_enc.adx --keycode 9923540143823782"

for f in *_enc.adx; do
    printf '\x09' | dd of="$f" bs=1 seek=19 count=1 conv=notrunc
done
(If, conversely, you need to listen to P5R audio without having your ears blasted, you would run:)
-
cmd /c "for %f in (*.adx) do vgaudiocli.exe %~nf.adx %~nf_dec.adx --keycode 9923540143823782" $dec_adxs = Get-ChildItem .\*dec.adx* -recurse foreach ($dec_adx in $dec_adxs){ $stream = [System.IO.File]::ReadAllBytes($dec_adx) $stream[19] = 0x00 [System.IO.File]::WriteAllBytes($dec_adx, $stream) -
wine cmd /c "for %f in (*.adx) do vgaudiocli.exe  %~nf.adx %~nf_dec.adx --keycode 9923540143823782"

for f in *_dec.adx; do
    printf '\x00' | dd of="$f" bs=1 seek=19 count=1 conv=notrunc
done
Adding Music to your Mod
Audio files should be placed in the proper directory depending on what game you are modding.
If modding P3F or P3P on PC, you can simply replace the corresponding files. For P4G and P5R, the files should be named according to their streaming ID; the file naming format is
(streaming ID - 1)_(whatever you want here).For P4G or P5R on PC, AWB Emulator is the recommended method to replace audio as it allows audio replacement without repacking and distributing the entire sound archive. Documentation on AWB Emulator can be found here.
-
Place your audio files in
(mod folder)/FEmulator/AWB/(archive name), where(archive name)is a folder named after the archive you want to edit. P4G uses HCA files for its audio.For example, if editing music, the corresponding audio would be placed in
(mod folder)/FEmulator/AWB/snd00_bgm.awb, wheresnd00_bgm.awbis a folder. -
Place your audio files in
(mod folder)/FEmulator/AWB/(archive name), where(archive name)is a folder named after the archive you want to edit. P5R uses encrypted ADX files for its audio.For example, if editing music, the corresponding audio would be placed in
(mod folder)/FEmulator/AWB/BGM.awb, whereBGM.awbis a folder. -
Place your audio files in
(mod folder)/P5REssentials/(name this whatever)/data/sound, following the file structure for the original audio file(s). P3P uses ADX files for its audio. -
Place your audio files in
(mod folder)/BGM, following the file structure for the original audio file(s). P3P uses ADX files for its audio.
For example, to replace I’ll Face Myself in P4G, find the ID that corresponds to that song. Its BGM ID is 9, which corresponds to a streaming ID of
38.
Therefore, the file could be named anything with
37in the front, such as but not limited to:00037_streaming37037_I_ll_Face_Myself
Repacking an AWB file
This method of replacing audio was used for P4G and P5R before the release of AWB Emulator, but nowadays the AWB Emulator method is preferred in the interest of saving space. Still, there are niche cases where one may want to repack an AWB instead, such as modding the console releases of P4G and P5R.
For this, open your Sonic Audio Tools folder and drag the ACB file onto AcbEditor.exe. This should give you a dump of the entire contents of the ACB/AWB in a folder. Create your ADX/HCA as normal, but then place it in the folder created by the dump. Then, repack the ACB and AWB by dragging the folder onto ACBEditor. In your mod, create the path
(mod folder)/P5REssentials/CPK/(name this whatever)/(path to the AWB)and place your repacked ACB and AWB inside.