P4G
P4G Vita
This guide was written by Dexxtrip on Gamebanana / @bonq.com on Discord.
This guide covers the process of porting Demon designs from Shin Megami Tensei DX2 to Persona 4 Golden. These instructions apply to both the PC and Vita versions unless specified otherwise.
Table of contents
Required Tools
These are the tools needed for porting DX2 models.
| Tool | Usage |
|---|---|
| Noesis | Needed for properly exporting FBX models in GMO specific formatting. |
| GMOConv & GIMConv | Needed for converting exported FBX into usable GMO and converting textures. |
| Sadoaiya | Needed for optimizing models. |
| Notepad++ | Recommended for fixing materials and changing texture file extensions. |
| GMOView | Checking your model visually. |
| GMO2AMD Python Script | Adding the AMD header to GMO files. |
| A complete dump of the game with models in FBX format. | For working with any and all files. |
Model Porting with Noesis
First, let’s open up our model in Noesis to check if we have the right one. For the rest of this tutorial, I’ll be working with the Sonic model, but this information will apply to every single other design.
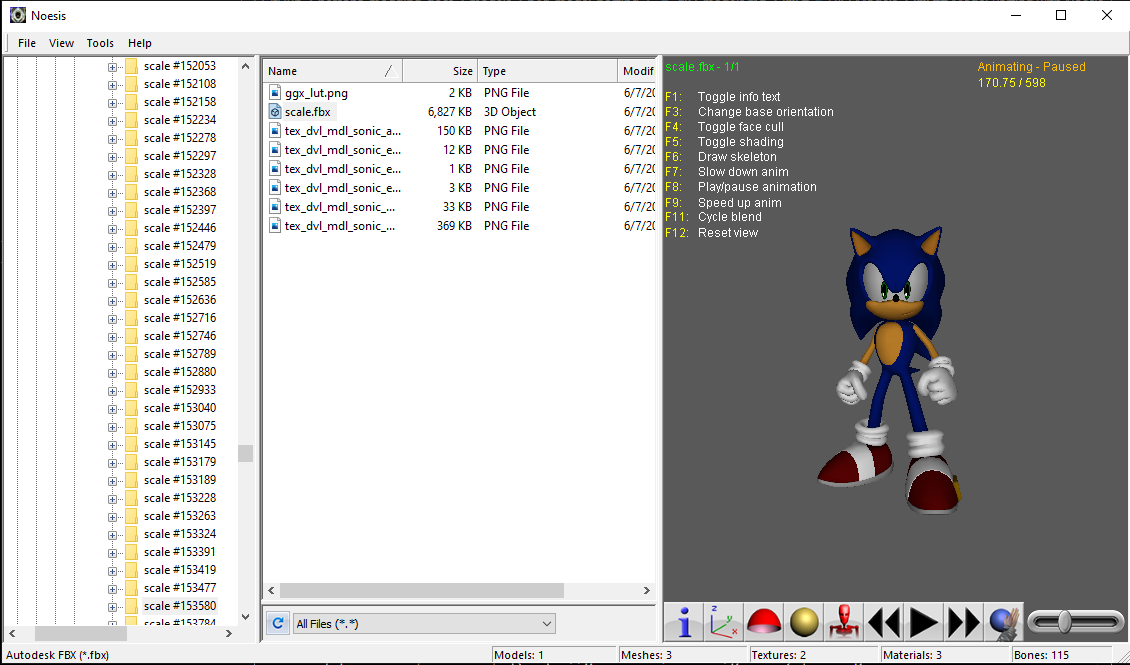
Once opened, right click the model labeled “scale.fbx” and click Export.
In this window we’ll need to set a few options.
First, set the Additional Animation Output value to “Multi-FBX Anim Sequence” then set these options in the export settings.
-fbxoldexport -rotate 0 0 180 -bakeanimscale -bmoda -scale 140
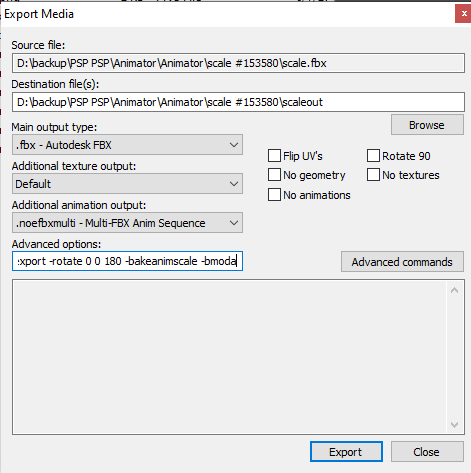
This does several things, so let’s break it down.
- First, it exports the model in an older format so that it can be converted by GMOConv later.
- Second, it scales the models up to a more reasonable size.
- Next, it exports all animations as their own individual FBX files.
- After that, it rotates the model 180 degrees on the Z axis so the model faces the correct direction in P4G.
- Finally, it adjusts the bones to match the model.
Once exported, you should see a list of models like this:
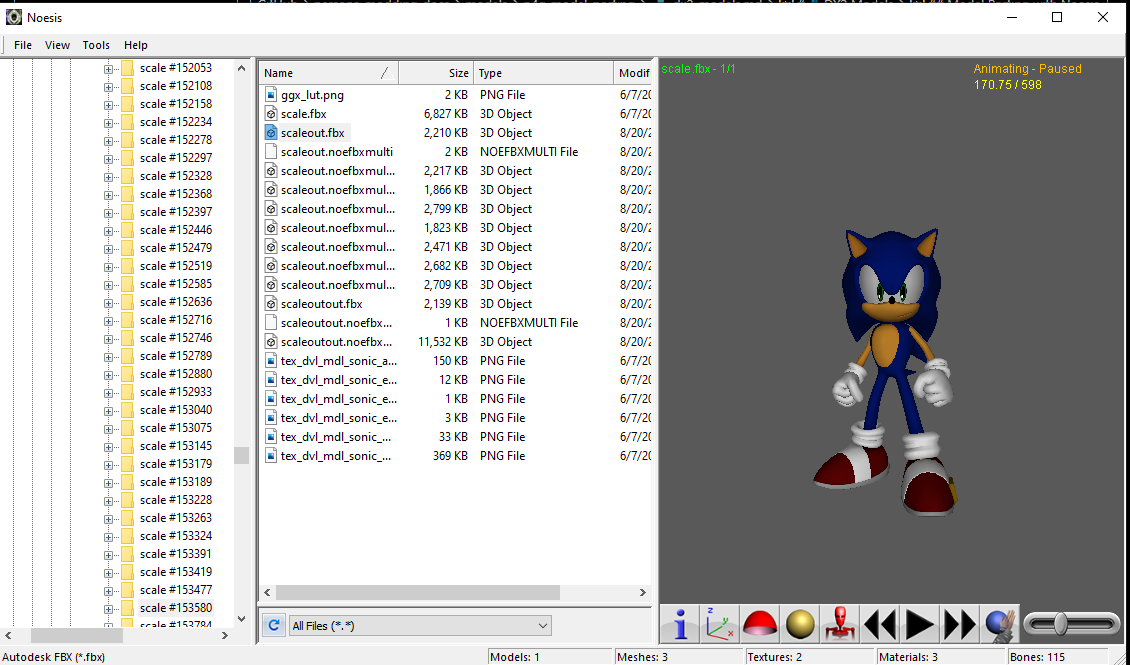
Now that we have our animations exported as FBX, let’s check them before we get started on making the model itself.
Open up each animation one by one in Noesis and confirm that it’s working as intended. You mainly want to check Idle, Attack, and Skill, as well as any other versions of those including numbers.
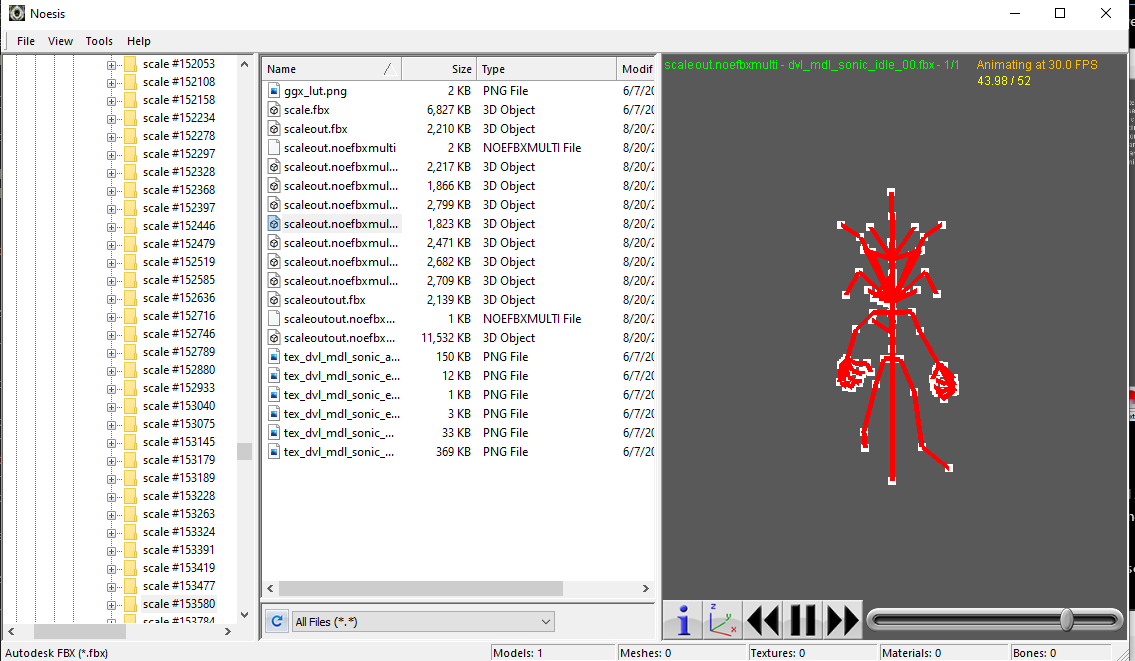
The model will not contain any mesh data, just the animation of the bones. The model will also not be facing the screen, this is intentional as it will be facing the correct direction as a GMO.
If you encounter an animation that isn’t animated and stays in an A pose, then you can disregard it and continue with the other existing version of the same animation.
Now, let’s move onto importing those animations.
Importing Animations
Importing Animations is relatively simple. Open up a command prompt next to GMOConv and pass an argument like this, replacing the fbx files with the path to yours:
gmoconv scaleout.fbx -S -motions scaleout-skill.fbx scaleout-attack.fbx scaleout-skill.fbx scaleout-attack.fbx scaleout-idle.fbx

This command does a lot of things, so let’s break it down.
- First, it converts all models to GMO.
- Next, it merges all of the motion data into the first model.
- Finally, it extracts the model as a GMS.
This process can take between a few minutes and a few seconds depending on the speed of your computer.
Once finished, open up GMOView and check your model.
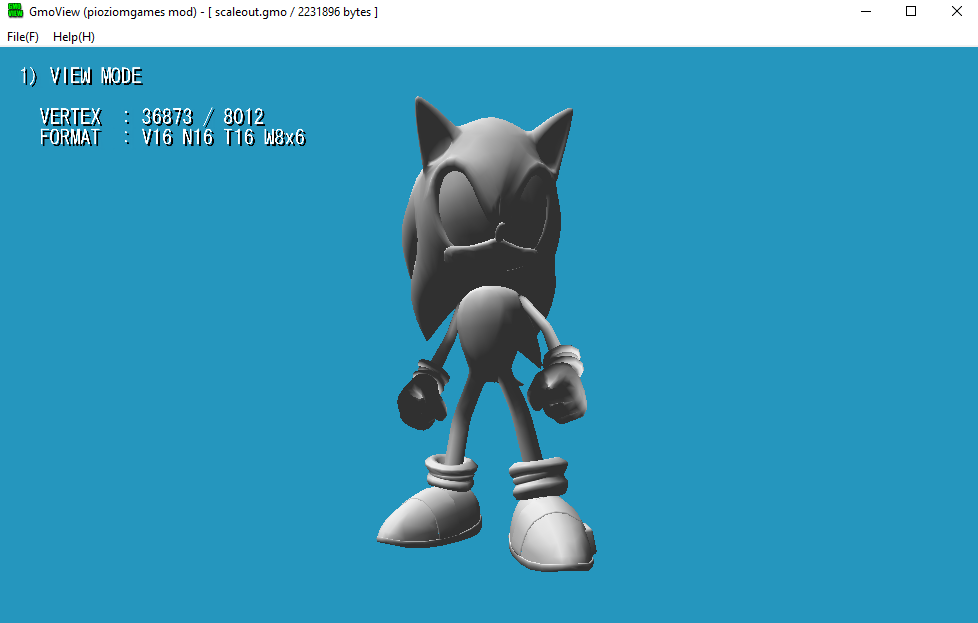
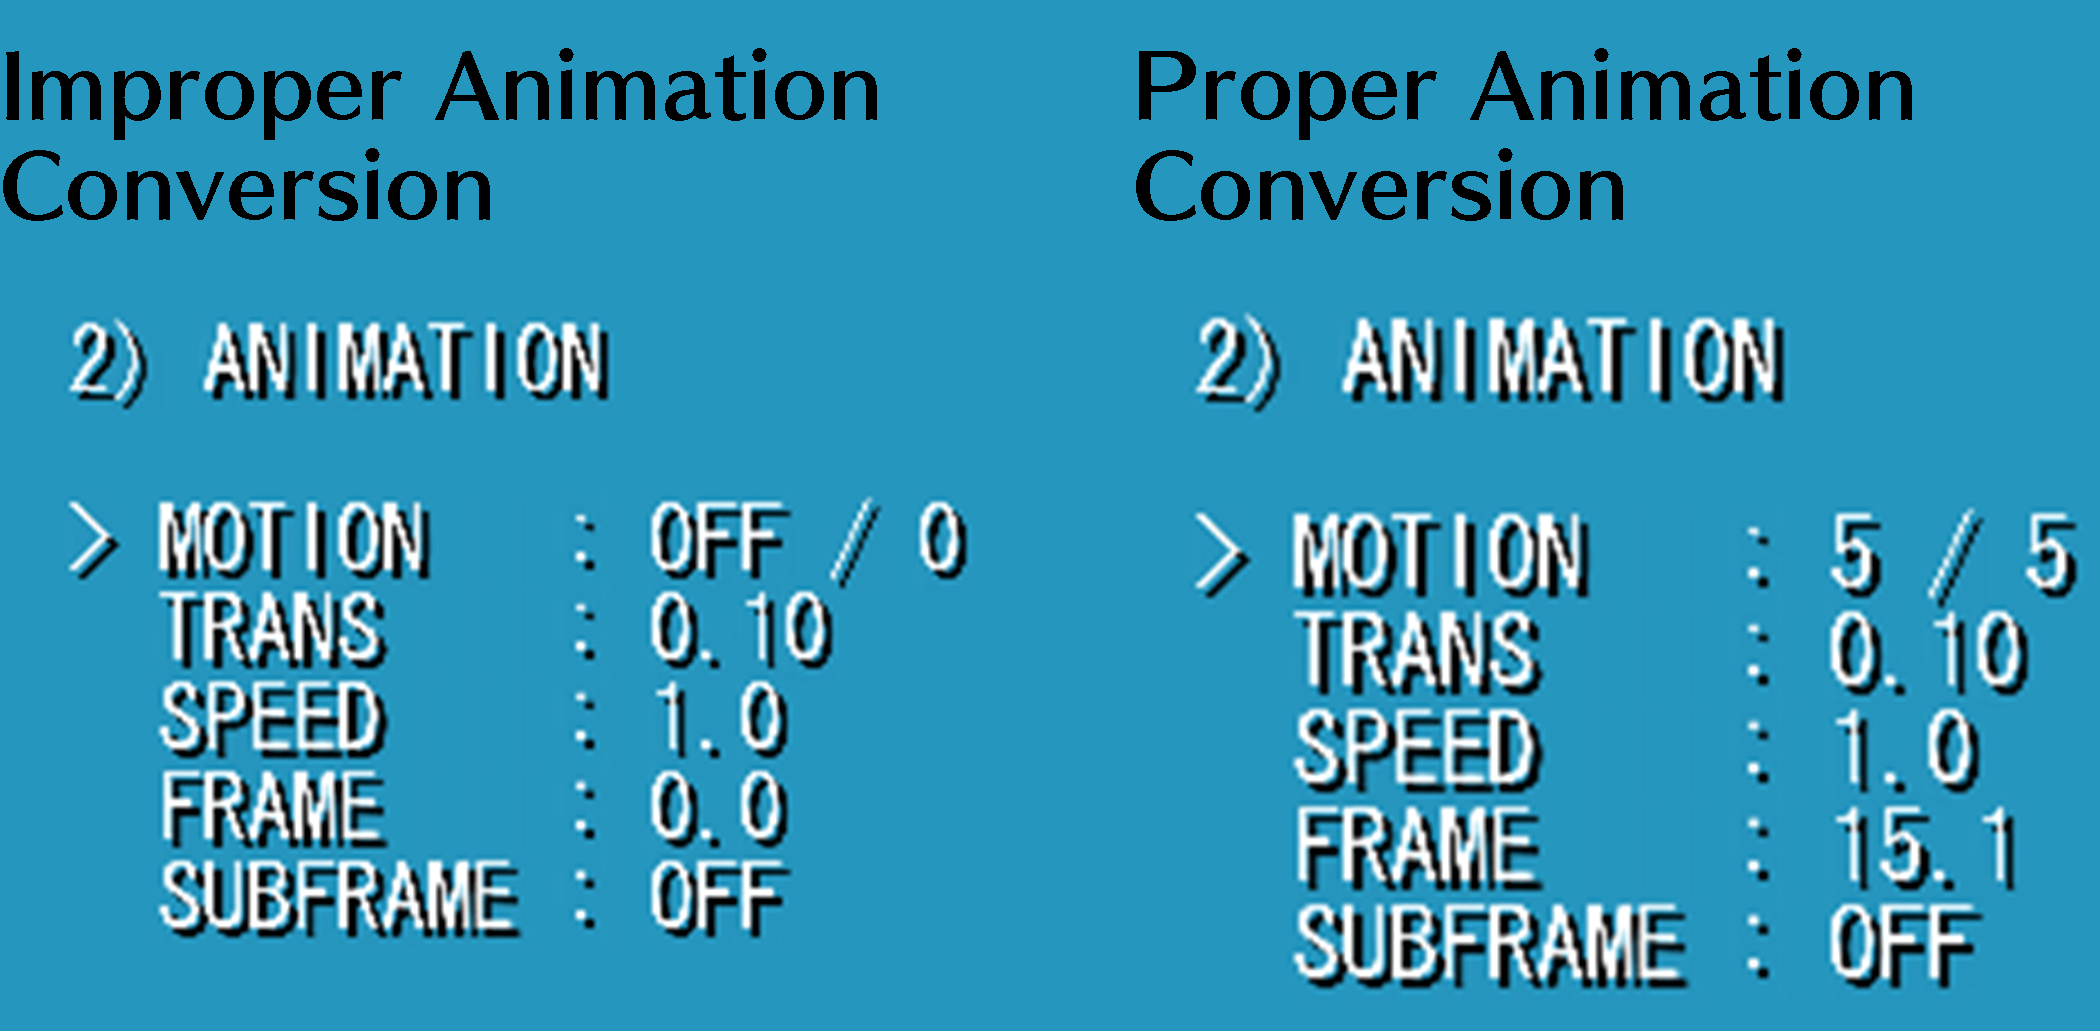
Your model won’t have textures, this is normal and we’ll fix it in a second. Press 2 on your keyboard and flip through the animations to check that the process went over smoothly. You want to make sure you have a total of 5 animations as shown here.
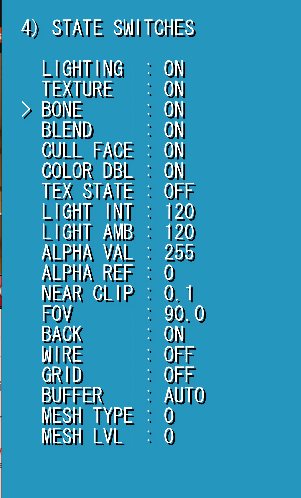
Before closing, let’s check one more thing. Press 4 on your keyboard and scroll down to BONE, turn it on.
Your model will have it’s bones highlighted in red, as shown here:
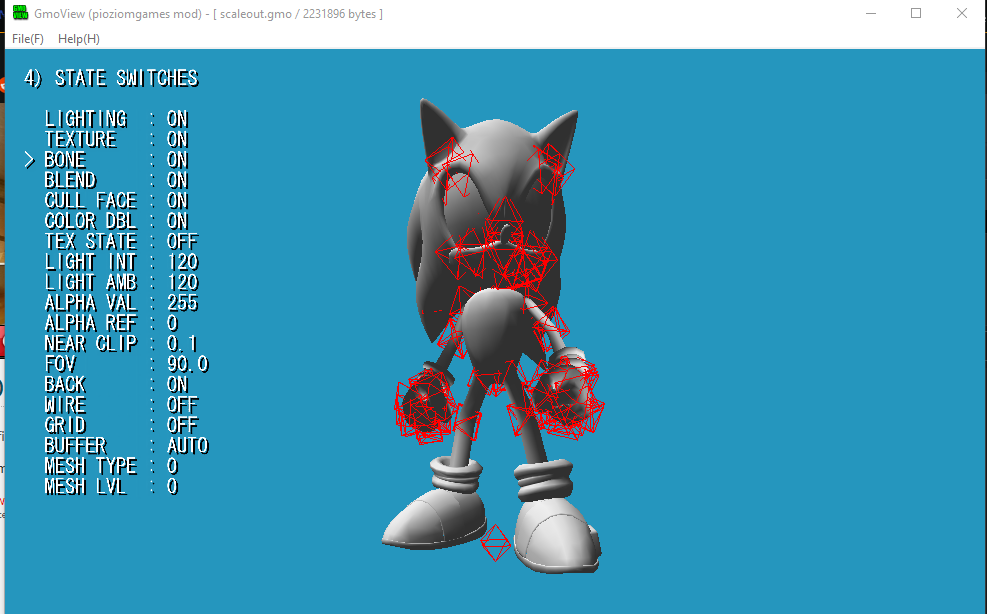
If you don’t see bones around your character, press the middle mouse button and drag your mouse upwards.
Check if you see a mass of red lines surrounding your model. This is typical of models with broken bone placement. Jump back to the section where we went over exporting the model in Noesis, and double check that -bakeanimscale and -bmoda are inserted in export options.
Once you’ve confirmed that the model is working as intended, let’s move on to importing textures.
Texture Importing
In this section, we’ll go over texture importing.
First, we need to check how many of the textures are actually necessary. Open up your extracted .GMS file in a text editor of choice and look for this string:
Texture "
You should find your texture mentions like this:

Change the extensions to .TM2 like this:

Now, you’ll need to convert those PNG files to TM2.
For Playstation Vita users, you’ll most likely need to reduce the textures to 512x512 at the maximum to prevent GPU crashes.
Open up a command prompt window next to GIMConv and pass an argument like this:
gimconv (path to png) -o (path to tm2)
You should end up with TM2 textures for all textures mentioned in the GMS.
Next, we need to reconvert our GMS back into a GMO to apply the inserted textures. Open up a command prompt and pass either one of these commands:
-
gmoconv (path to gms) -
sadoaiya (path to gms)
Once you’re done, let’s reopen our freshly made GMO in GMOView and check our textures.
Your model should be fully textured now.
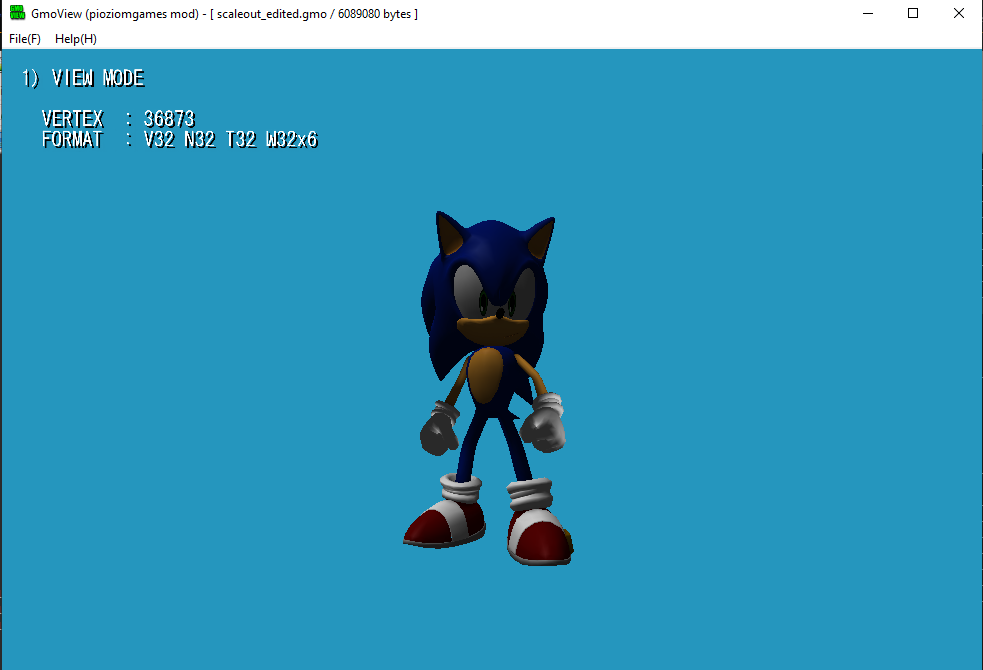
You may notice a brightness issue with your model, let’s address that.
Material Fixing
Go back to your opened GMS file again and move to the materials section, you want to fix the materials by copying the material data from another Persona in P4G.
You can do this by extracting a model from the base game using GMOConv, like this:
GMOConv -S (path to gmo)
I’ll be using Surt as an example here.
Open up the new GMS file and move to the material section like this: 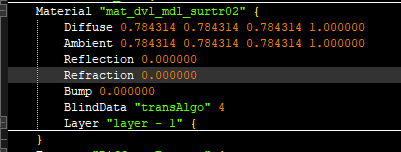
Copy and paste everything above Layer onto your GMS file like this:
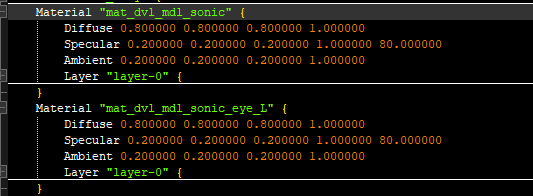
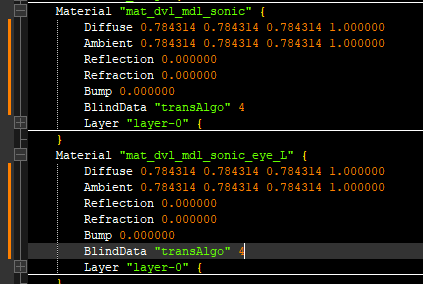
Once your model is adjusted, reconvert the GMS back to a GMO like before.
Here’s a before and after showing the adjusted materials.
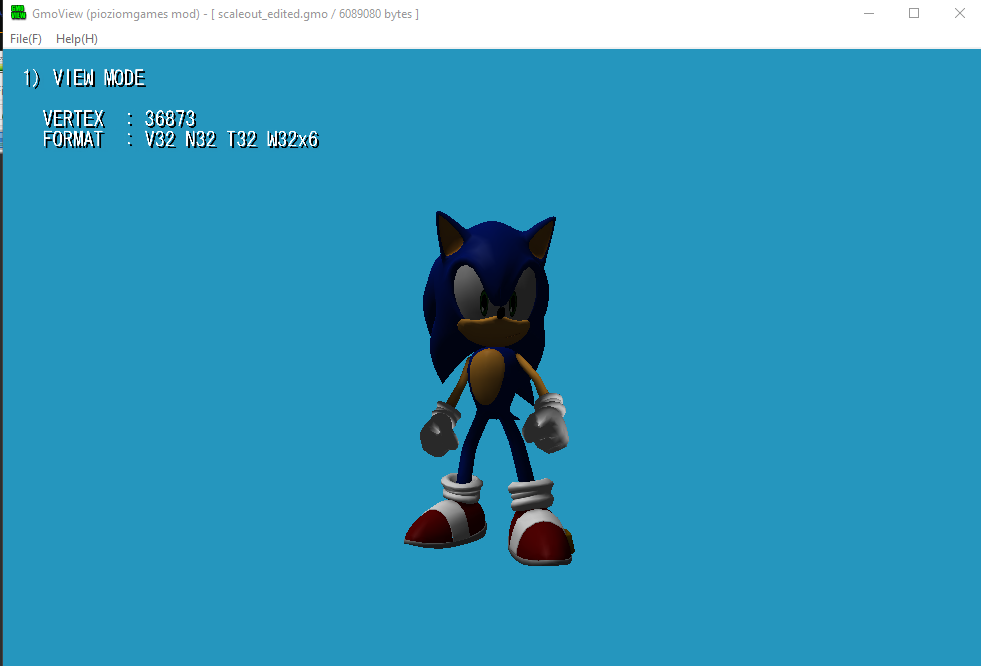
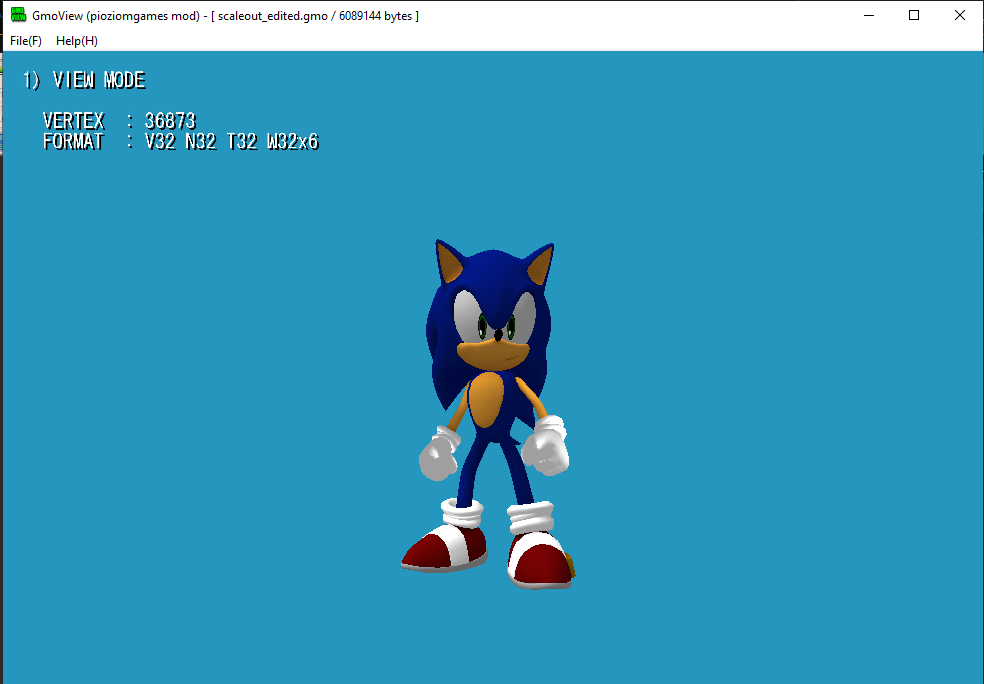
You’ll definitely notice a brightness increase, this step is very important for ensuring the model works in Persona 4 Golden.
Now, let’s convert our model to AMD so we can test in game. Pass either command like this:
-
python amd.py (path to gmo) -
sadoaiya (path to gmo) -A
Once you’ve generated your AMD file, let’s move onto testing it in game.
Testing in game
The easiest way to test your model in-game is to replace an existing model and check that instead, here’s a list of what models go with which Persona.
Testing in game is the final part of getting models to work properly. You’re going to need to check for a lot of things while in the game, so here’s a list:
- Model visibility (Does the model actually render?)
- Positioning and scale in the compendium (Is the model centered in the compendium screen?)
- Positioning and scale in the fusion screen (Is the model centered in the fusion screen?)
- Positioning and scale in battles (Is the model positioned correctly in battles? Is it clipping into the floor or too high up?)
- Flashing & Clipping bits (Are any parts of the models acting irregularly?)
Here are a few visual examples of what I mean:
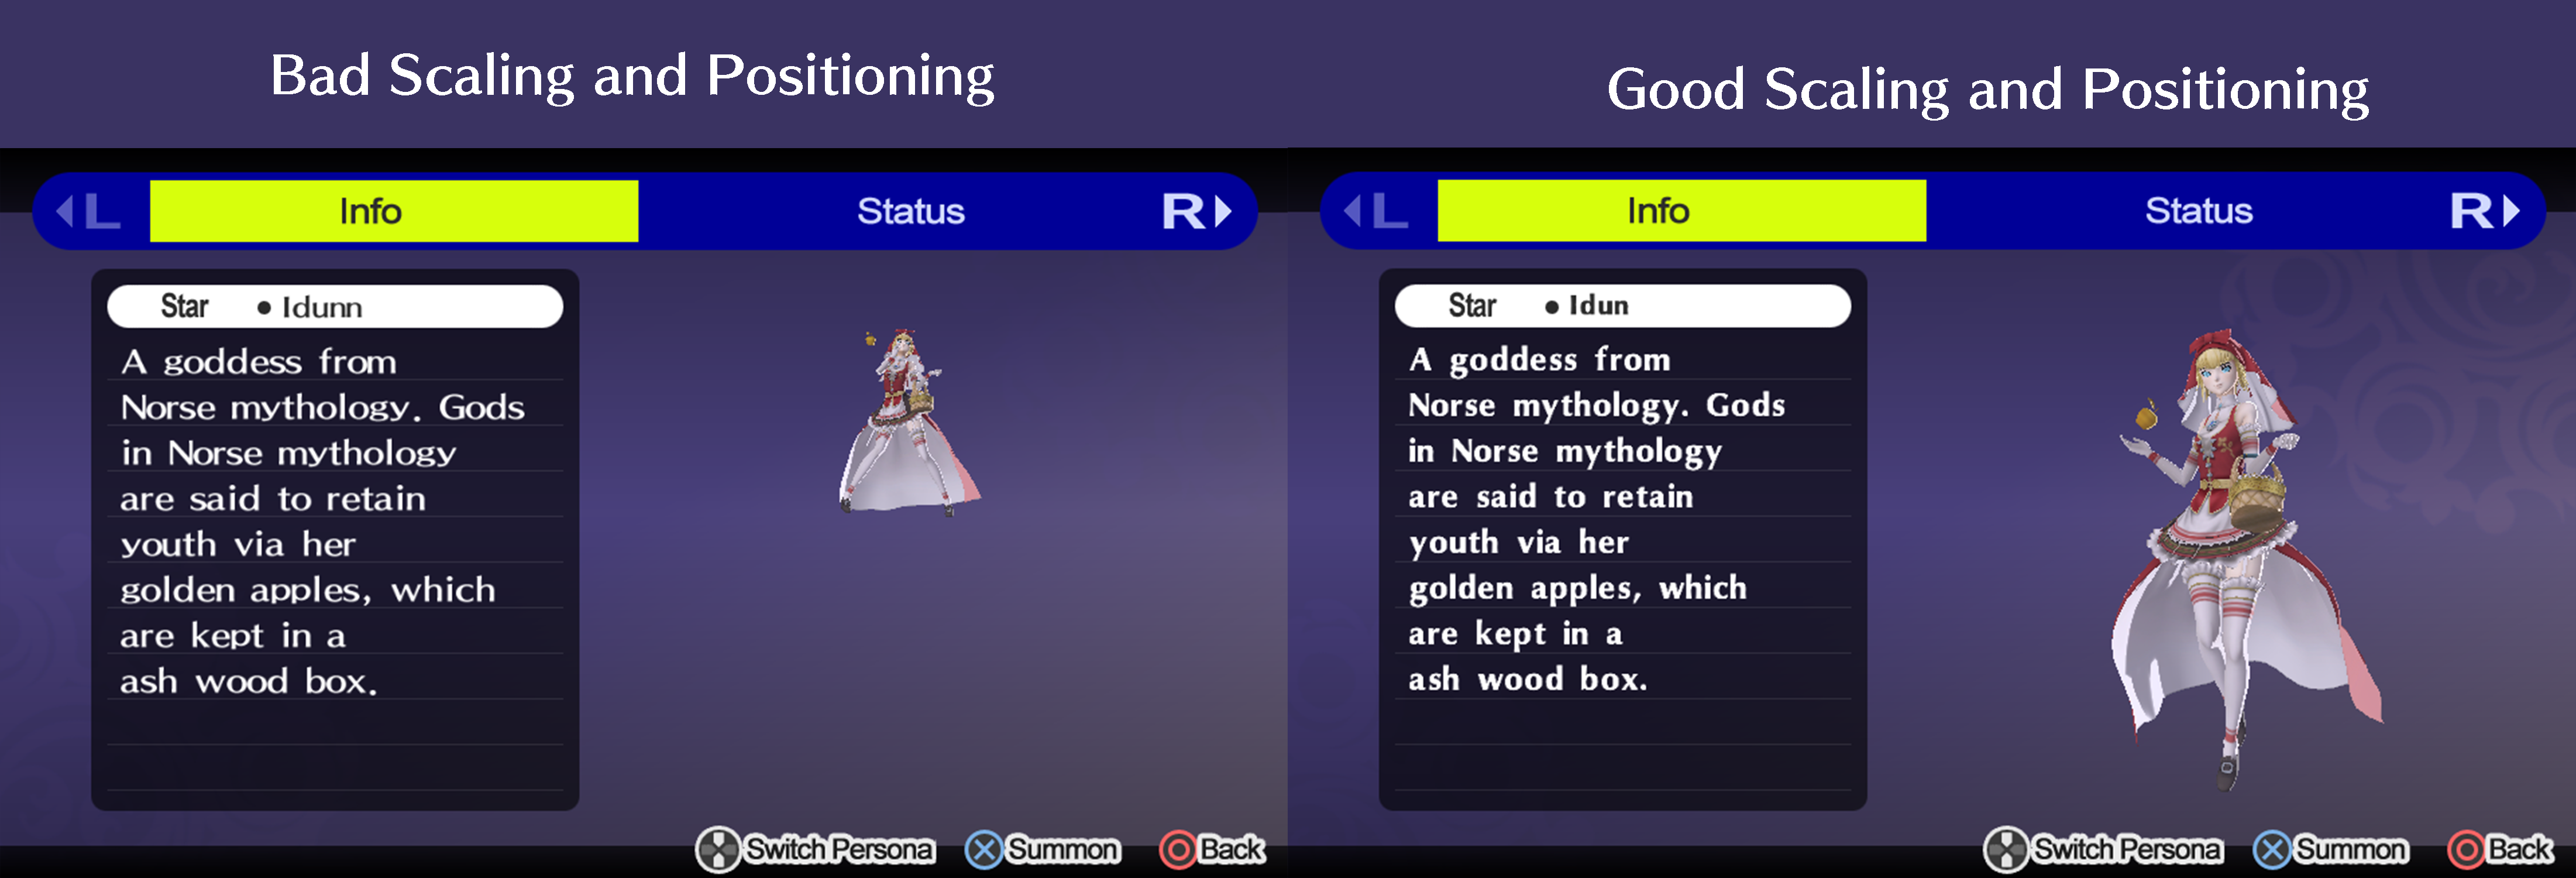 Example of good and bad compendium scaling and positioning. You want to aim for the image on the right where the Persona takes up as much of the empty space.
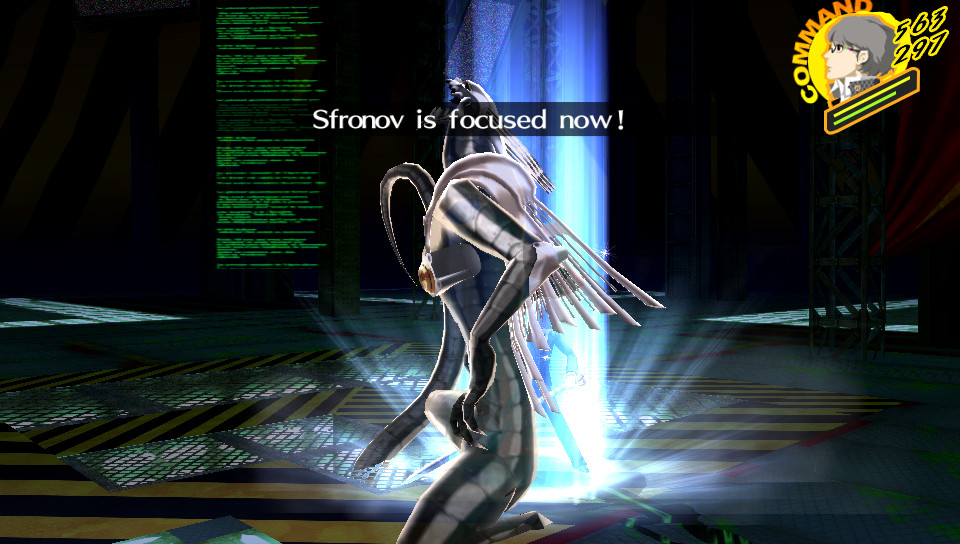 Example of bad battle positioning, take note of the model clipping into the floor, you don’t want that.
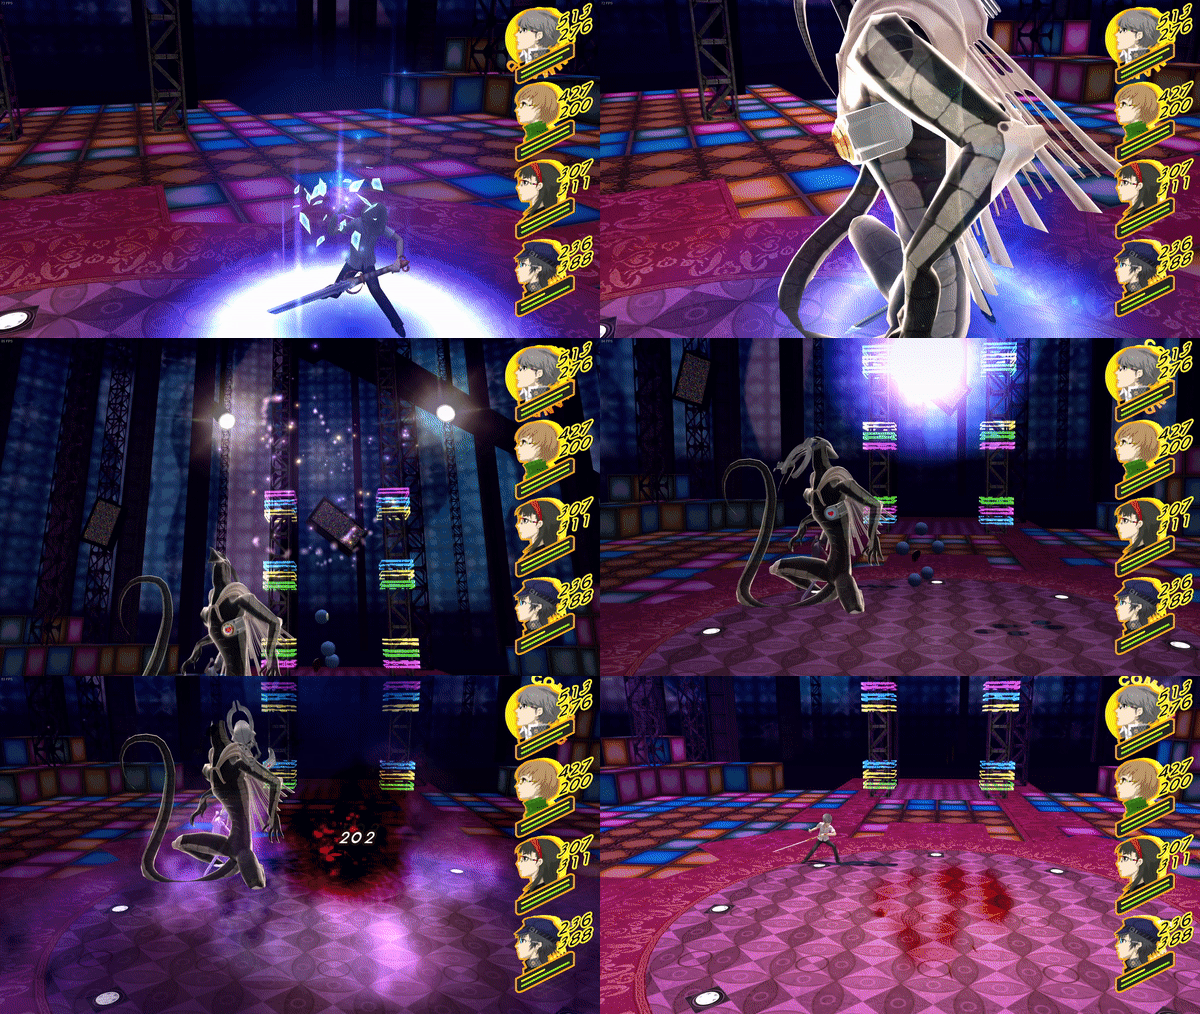
Example of irregular model performance. This is typically caused by missing blend subsets.
Before we wrap up, you may have noticed that the model size isn’t the best. You have a pretty easy way of fixing this.
For this method, you’ll need to dump the ps_model.bin from cmbroot.arc. This file handles the scaling and positioning of models in the compendium and fusion screen. You can use this tool and this guide to make your changes.. If you’re unable to use cheat engine, you’re also able to make these adjustments blindly and repeatedly check in game.
Once you’ve checked all of the examples listed above, verified that the size is adequate, and can verify that all other aspects are working perfectly, congrats! You’ve successfully ported a model from DX2!
In the next section, we’ll go through other potential problems you may have faced and how to fix them.
Troubleshooting
Here are some possible solutions to problems you may be having.
- The model is invisible / not rendering.
- Double-check that you fixed the materials for use in P4G, if you didn’t, the model will be invisible in game. The easiest way to do that is to copy the material data from another Persona’s GMS file.
- The model is too dark.
- You most likely forgot to fix the materials like I suggested. Go back to your GMS file and copy the material data from an existing Persona in the base game and paste it into your model’s material data.
- The model is incorrectly positioned, or scaled in either the compendium or fusion screen.
- This is due to the stock ps_model.bin formatting for the model you replaced. To adjust these, you’ll need to use this tool. Dump the file by opening cmbroot.arc in Amicitia and extracting ps_model.bin. Once that is done, open it in the tool, find the model value by checking this page, and make your adjustments there. You can also use cheat engine and this tutorial to make your changes on the fly for later applying to the ps_model.bin file itself.
- The model is incorrectly positioned during battles.
- This is a similar problem to the last one, the stock positioning for the model is different than your model. To fix this, you’ll need to use 010 Editor, this template, these structs, and the MODEL.TBL file from init_free.bin to fix the offset.
- Some of the model’s parts are blinking in and out of existence or rotating wildly.
- This is due to missing blend subsets. If you didn’t before, try optimizing your model with Sadoaiya to re-add blend subsets if they’re missing. Once you’re done, retest in-game.
- The model’s animations aren’t correct.
- During the process of converting the FBX files back into a single animated GMO, you messed up. The order of animations should be something like this.
- Skill (What plays when you cast a magic skill)
- Phys (What plays when you use a physical skill)
- Skill
- Phys
- Idle (What plays when viewing the model in the compendium.)
- If the model doesn’t match this order, go back and double-check the command you ran when converting your FBX files.
- During the process of converting the FBX files back into a single animated GMO, you messed up. The order of animations should be something like this.
Wrapping up
Assuming everything is in working order now, you’ve successfully and fully ported a DX2 model to P4G!