P4G Vita
This guide was written by Dexxtrip on Gamebanana / @bonq.com on Discord.
This guide covers the process of porting model mods from Persona 4 Golden on PC to Vita.
Table of contents
Required Tools
| Tool | Usage |
|---|---|
| Sadoaiya | Required for properly optimizing models to Vita format. |
| Image Magick | Recommended for batch optimizing textures. |
| PSP Tools | Needed for converting models, previewing models, and convering textures. |
Before we get started
The first step to porting a model to P4G is to know the limitations, there’s an entire possibility the mod you choose won’t work.
Before you get started on a model mod of your choosing, I highly recommend running any of the AMD files through Sadoaiya to check for data chunk errors. Data chunk errors are a HARD STOP on that mod being able to be ported. You’re better off remaking the entire mod yourself at that point.
For this guide, I’ll show various options you have for porting model mods of different types.
-
HD Models
Other Required Tools Usage HxD Required for checking proper extension for textures. Before we get started
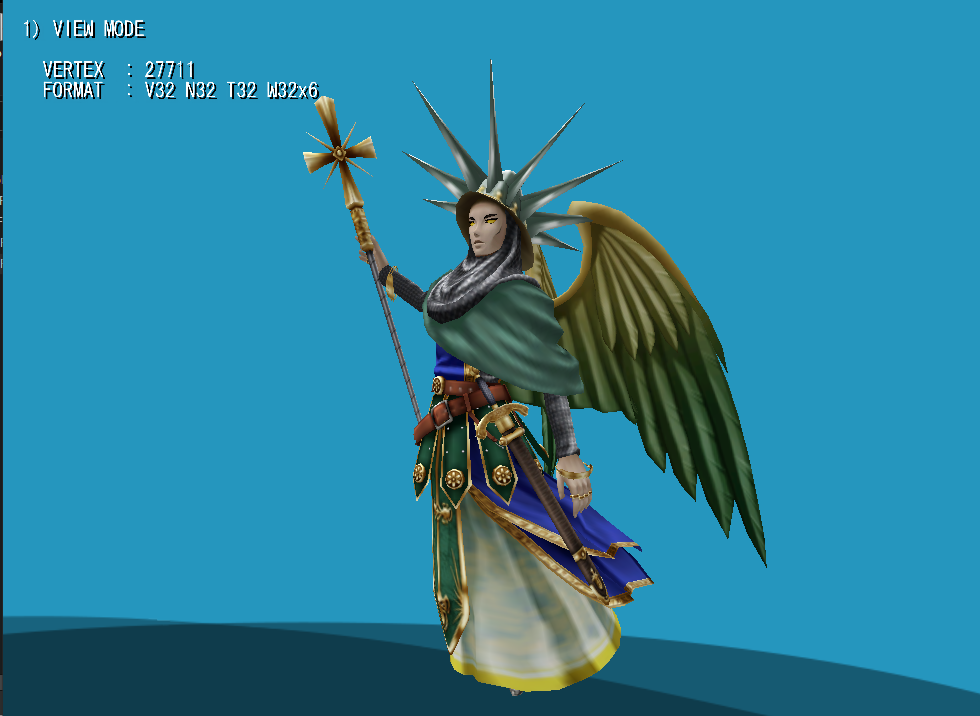
For this section, I’ll walk you through all of the steps required for optimizing an HD Persona model. I’ll demonstrate on one model from a larger mod, Principality from HD Persona Models. This is a good example as it has various aspects we need to fix before porting to Vita.
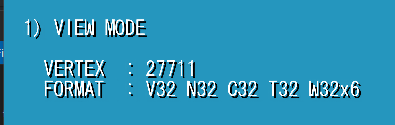
First, let’s open the model in GMOView to check how the model looks before getting started.
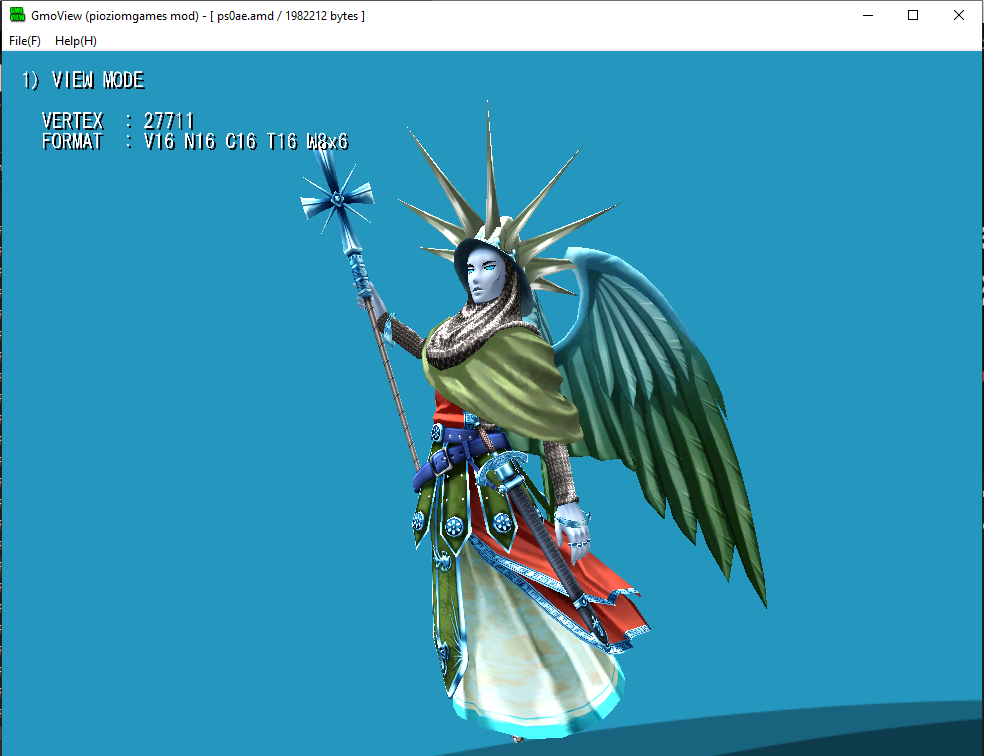
Let’s break down each issue that we can notice just right here.
- First, the model’s textures are too high resolution.
- Second, red and blue channels are swapped.
- Third, vertex colors are present.
- Fourth, the model isn’t optimized for Vita.
Let’s fix each issue one at a time.
Texture fixing
Let’s start off by moving our model to a safer working space where files can’t get cluttered or lost.
Next, open a command prompt next to our AMD file and type in a command like this
Sadoaiya -s (path to amd)This will generate a GMS file and a texture folder.
Open the texture folder. Inside you’ll find a texture file, in our case it’s a DDS file. We’ll need to check if it actually is one though.
Open up a Hex Editor and drag the texture file inside.
Read the first line, the first 3 letters on the right are the true extension.

In our case, the image is actually a .GIM, change the extension of the texture file.
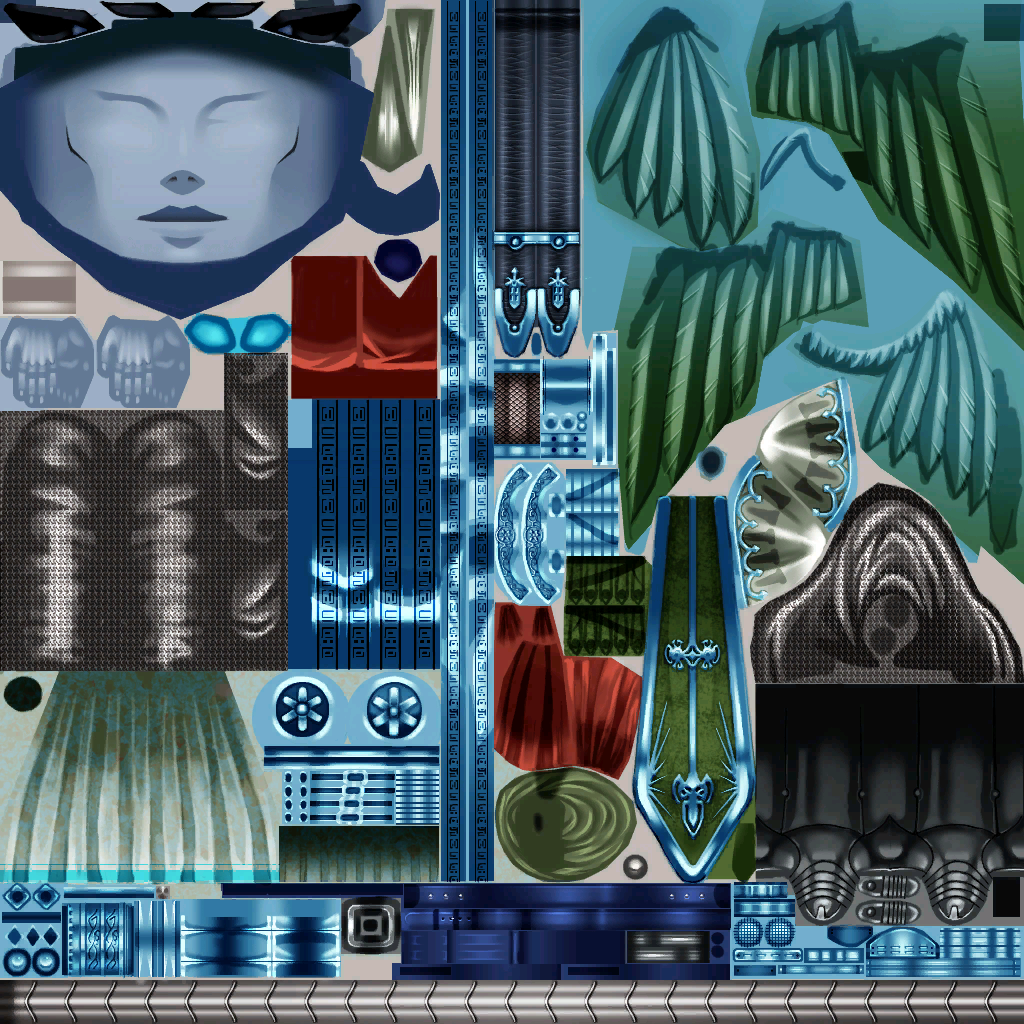
If the models textures are blue tinted, that means that the red and blue channels are swapped, and thus the texture is a .GIM
In most cases you should safely assume that changing the texture extension to .GIM will allow it to be properly converted.
Next, open up a command prompt next to GIMConv and pass a command like this
gimconv (texture file) -o (texture file.png)
Very important that you set the picture as a PNG for easy editing in a photo editor of choice.
Considering our texture is a GIM file, the red and blue channels will be swapped, it may not be like that for you.
Open up command prompt and pass a command like this in Magick to swap the red and blue channels.
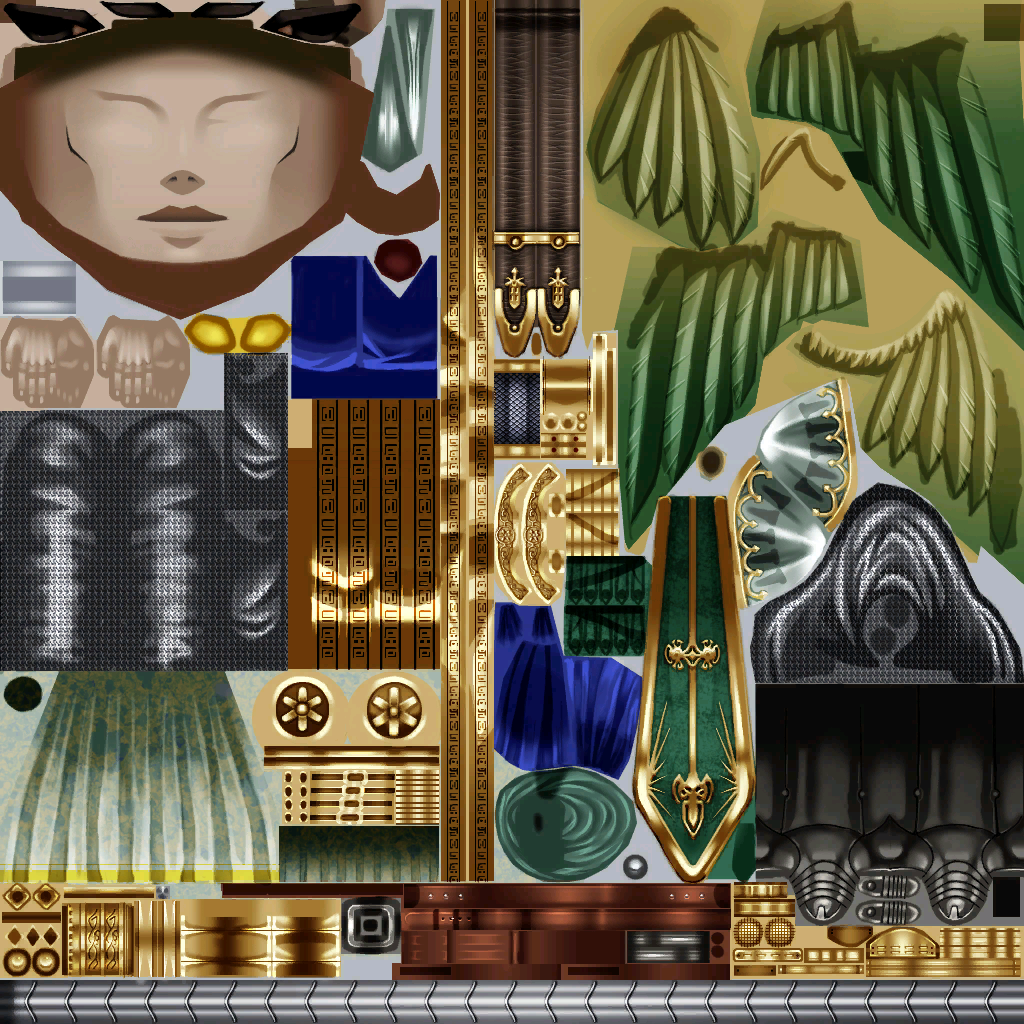
magick convert (path to png) -separate -swap 0,2 -combine (path to png)Your textures colors should be fixed, as shown here.
Now, we need to resize this image by half so that it fits within the Vita’s constraints, pass another command like this.
magick convert (path to png) -resize 50% (path to png)This resizes the picture by 50%, your output file should be within 512x512.
Now that our texture is fixed, let’s convert it back to TM2 for inserting. Pass a command like this in GIMConv.
gimconv (path to png) -o (path to tm2)This will convert the png file to tm2 for later importing. Next, we need to fix the .GMS file.
Fixing the GMS
In a text editor of choice, open up the GMS file and navigate to the texture mentions. For easier searching, copy this string into the search bar
Texture "You should find your texture listed like this:

Now, we need to remove the junk data leftover from the original poster, remove everything before the texture file like this:

Then, change the extension to .TM2

Now, save the file. Next, we’ll need to reconvert the GMS data back into a model. Open up a command prompt next to Sadoaiya and pass a command like this
sadoaiya (path to gms)This will turn your GMS into a GMO, let’s take the time to preview our model in GMOView to ensure the textures were applied properly.
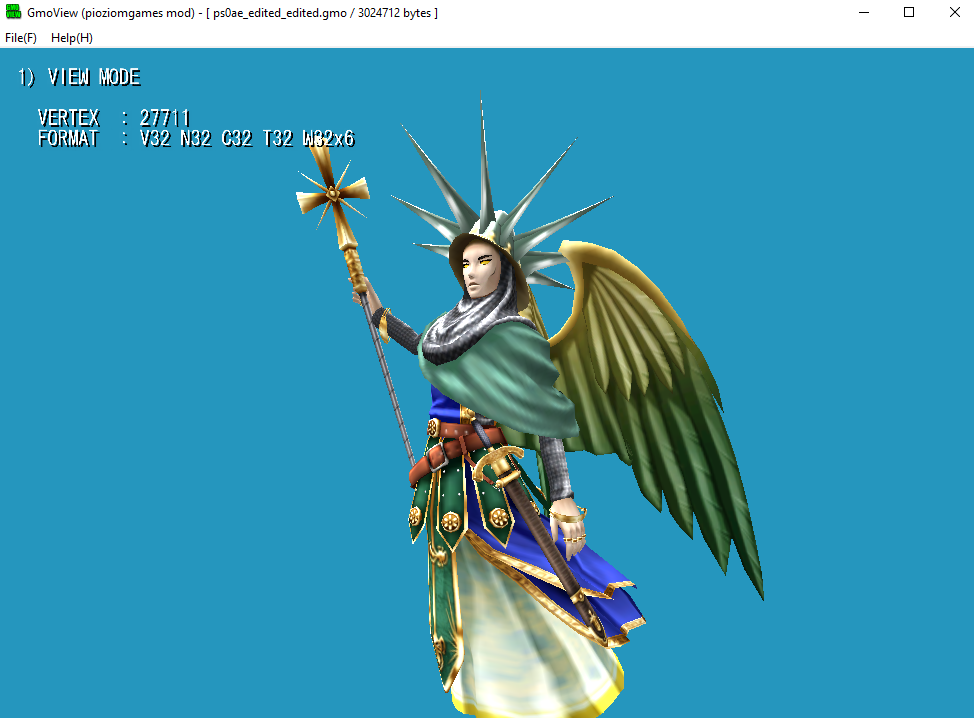
Perfect, the colors are now proper. After this, we’ll need to fix a few things about the GMO.
Fixing the GMO.
Persona 4 Golden Vita can be pretty picky about various aspects of it’s model files, so let me walk you through how to meet those standards.
First, we need to remove vertex colors or else our model will crash upon loading.
You’ll know if your model has vertex colors if you see a C32 / C16 value in the format section in the top left of GMOView.
In Sadoaiya’s command prompt, pass a command like this:
sadoaiya -C (path to gmo)This will remove vertex colors at the sacrifice of a slight loss in brightness. As shown here.
Next, we need to optimize for Vita to prevent more crashes. Again, in Sadoaiya’s command prompt, pass a command like this:
sadoaiya (path to gmo)This will optimize our model for Vita.
Finally, convert our GMO into an AMD with Sadoaiya, that way we can test in game. In Sadoaiya’s command prompt, pass a command like this:
Sadoaiya -A (path to gmo)This will generate an AMD for testing in game. Now, rename the model to remove the extra fluff and test in game.
If the model mod you’re porting contains a binarypatches / tblpatches folder, remember to carry that over! If you don’t your model has the potential to be off screen, poorly scaled, and generally messed up, it’s a very important step!
Testing in game
Once you get in game, test your model in all the various appearances. I made a list for you to check easily.
- Positioning and scale in the compendium (Is the model centered in the compendium screen?)
- Positioning and scale in the fusion screen (Is the model centered in the fusion screen?)
- Positioning and scale in battles (Is the model positioned correctly in battles? Is it clipping into the floor or too high up?)
All of these should be correct assuming the original mod is also correct. If these aspects don’t feel right to you, double check that you carried over all necessary extra files that I mentioned in the warning.
If all is good, then congrats! You’ve successfully ported an HD model to Persona 4 Golden on Vita.
In the next section we’ll go over potential problems you may have faced.
Troubleshooting
- GIMConv fails to convert the texture.
- You didn’t properly change the extension of the texture. Go back into HxD and check the first 3 characters again and verify if you properly changed the extension.
- The model instantly crashes upon loading.
- Make sure you removed vertex colors on the model as this can cause crashes. If you can verify that vertex colors are removed, try optimizing the model in Sadoaiya. If it’s optimized, triple check that you actually resized the textures before importing.
-
balls
-
other balls