Contributing
Table of contents
These docs are open-source and community driven. Any contributions are appreicated!
Setting Up The Fork
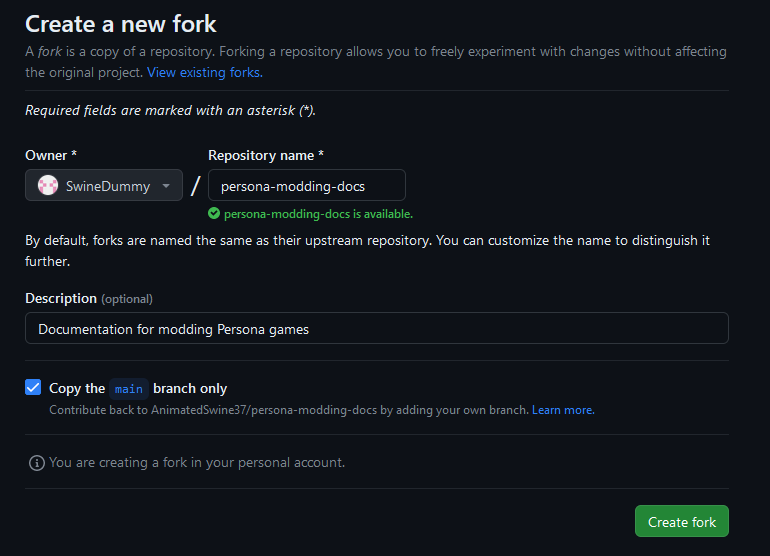
First you’ll need to fork the repo, this will act as your own copy of it that you can freely change.
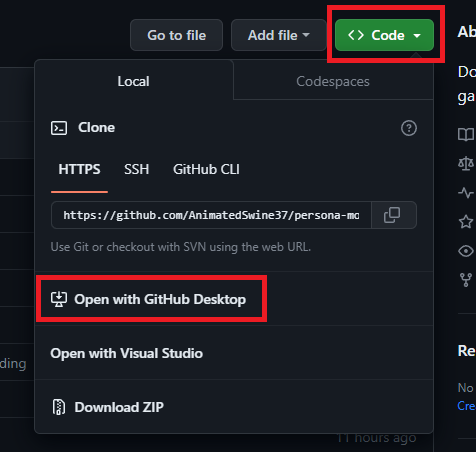
Now you should clone the fork to your computer so you can work on it locally. If you’ve not worked with GitHub before, the Github Desktop app is a fairly user-friendly way of doing so. Just click Code and then Open with Github Desktop on your fork’s page.
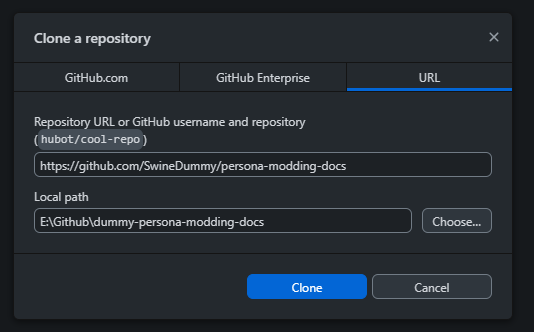
Assuming you’ve installed Github Desktop and signed you’re into it, it will open and ask you where you want to clone the repo to. Select an appropriate folder and click Clone.
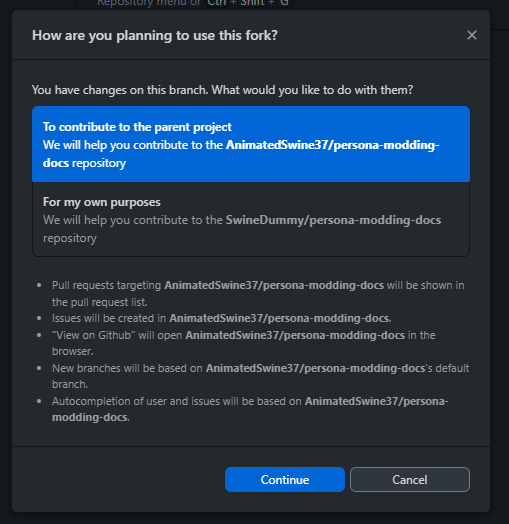
When asked how you’re using this fork say To contribute to the parent project.
Now you’ve cloned your fork to your computer! You can see the files by clicking Show in Explorer.
Running Locally
Before you start making changes it’s a good idea to run the site locally, then you can see exactly how your changes will look as you make them.
This site is generated using Jekyll which uses Ruby so first you’ll need to install Ruby 3.2.x. For a comprehensive guide check out Ruby’s installation documentation.
For Windows users the easiest way to do so is using Ruby Installer
Download the latest Ruby+Devkit file and run it (as of writing Ruby+Devkit 3.3.6-2)
Once you’ve installed Ruby open up a terminal in the folder you cloned your fork to. Then to install Jekyll and this site’s dependencies run the following two commands:
gem install bundler jekyll
bundle install
On Windows you may need to run the terminal as Administrator for this to work
Now you’re ready to run the site, to do so run the following command:
bundle exec jekyll serve
If all went well you can now go to http://127.0.0.1:4000/persona-modding-docs/ in your browser to see the site running locally.
If you get an error that the
ffigem could not be found locally, double check that you’re using Ruby 3.2.x by runningruby -v. If you’re on a newer version please downgrade to 3.2.
Whenever you change a file from now on, the site will automatically update to reflect the changes although you will have to reload the page.
Making Changes
Now that you’ve got your local copy up and running you can start making changes.
All of the documentation is written in Markdown (.md files) which can be edited with any text-editor you like, however, I’d recommend Visual Studio Code if you’re not sure.
File Structure
The files are layed out in groups, for example, everything under the Getting Started section is in the getting-started folder. Each .md file is then an individual page that will show up.
Adding A New Page
The easiest way to make a new page is to copy an existing page and change it to your needs. In particular, you’ll at least need to change some of the front matter.
Front matter is like a header, it contains metadata that Jekyll uses in a top section like this
---
title: Extracting The Game's Files
layout: page
parent: Getting Started
nav_order: 1
games: ['P3P', 'P4G', 'P5R']
---
Here’s a brief explanation of the fields that matter most:
-
This is the title of the page shown in the navigation bar and how you reference a page.
-
This specifies a type of layout the page should use, for the purposes of this documentation always leave this as
pageunless you know what you’re doing. -
If a page is a sub-page you need to set this. Note that if it’s a sub-sub-page you will also need to set
grand_parent.For example, SMT V Models has a parent P4G Model Porting and grandparent Models.
-
trueif the page will have children, use this for pages that have sub-pages like Getting Started. -
The order that pages will appear in the navigation bar, lower numbers appear first.
Children have unique orderings, i.e. the main pages (Home, Getting Started, Music, etc) go from 1, up, the sub-pages of Getting Started also go from 1 up, etc.
-
A list of games the page applies to. This is used for the filtering from the nav bar.
To see all current games or to add a new one check Adding A Game.
Once you’ve got the front-matter correct you can actually write the content of the page. All of the usual markdown syntax applies like * for italics, # for headings, etc, however there are also a few extra things you can do.
You can have a look at the Markdown Cheat Sheet for an overview of all of markdown’s regular syntax.
Common UI Elements
Below I’ll list some common UI elements you might want to add to your page. Note that this isn’t everything, if you want to find out more you can look at the Just the Docs documentation which is the layout this whole site is based off, and where most of this information comes from.
Images
To add an image, firstly place your file in the assets/images folder (if appropriate please use subfolders in there for organisation). Then add the following to your page:

Internal Links
Sometimes you’ll need to link to other pages on this site, to do so use the following syntax:
[Getting Started]({%link getting-started/index.md %})
Which will give you a link like Getting Started.
Callouts
Callouts can be used to bring attention to something important like so
You can use callouts
Here’s something important you need to know!
To add one to your own page add the following:
{: .warning }
> Here's some text
>
> Make sure you add > at the start for multiple lines!
As well as .warning there are .info, and .todo callouts with different colours. If you want to add another type of callout you can do so by adding to the callouts section in _config.yml.
You need to completely restart your Jekyll server for changes to _config.yml to take effect (i.e ctrl+c to stop it and rerun bundle exec jekyll serve)
Tabs
The Jekyll-Tabs plugin is used to provide tabs. These let you show multiple pieces of information like so
-
echo "This is some command prompt command!" -
Write-Output "This is some powershell command!" -
echo "This is some bash command!"
This can be useful where you have some command that varies depending on OS or game (it doesn’t necessarily need to be used for commands though). To do so add the following:
{% tabs commands %}
{% tab commands command prompt %}
Here's some information about command prompt
{% endtab %}

{% tab commands powershell %}
Here's some information about powershell
{% endtab %}

{% tab commands bash %}
Here's some information about bash
{% endtab %}
{% endtabs %}
The basic structure is that we have a tabs block with a name, in this case commands. Then we have any number of tab blocks with the name of the tabs block they’re a part of (so commands here), and the name of the tab which is shown to the user (like powershell).
Table Of Contents
A table of contents is useful for pages with many headings, to add one to a page add include_toc: true to your front matter. For example:
---
title: Contributing
layout: page
nav_order: 11
include_toc: true
games: ['Universal']
---
Adding A Game
Currently the following games are supported:
-
Universal (All Games)
-
P3P (Persona 3 Portable)
-
P3RE (Persona 3 Reload)
-
P4G (Persona 4 Golden)
-
P5R (Persona 5 Royal)
-
P4G Vita (Persona 4 Golden Vita)
-
P3F (Persona 3 FES)
To add a game you’ll need to edit _config.yml and add a new entry to the games section. For example, to add Persona Q2 you’d add the following:
- short_name: PQ2
  full_name: Persona Q2
  platform: 3DS
Where the short_name is what you’ll put in the games front matter and the full_name is what shows up in the nav bar. The platform is currently unused but may be used in the future.
Note that you’ll need to completely restart your Jekyll server for changes to _config.yml to take effect (i.e ctrl+c to stop it and rerun bundle exec jekyll serve)
Writing Guidelines
The aim of this documentation is to be a practical guide to modding games, and to be consistent throughout. As such, please remember the following when writing your guides:
-
Don’t assume knowledge: You should assume that anyone who’s looking at this is brand new to making mods and write your guides as such. In cases where you do need to assume knowledge (like assuming someone has a basic understanding of blender) please clearly outline this at the start of the section and, if you can, link to some good resources for learning it.
-
Don’t skip steps: This goes with the last point, be explicit about what you’re doing, don’t ever go from step A straight to step C.
-
Keep it practical: This guide aims to be practical, unlike the wiki which just lists information, this aims to teach people how to actually apply that information to make stuff. When making your guide have some end goal in mind, for example if you’re writing one on replacing music, know specifically that you’ll make a mod that replaces song x with y, and by the end of the guide make sure that’s actually happened.
-
Break up text: Try to break up text regularly with images, tabs, callouts, or line breaks. Having a huge wall of text for a guide is very daunting and hard to follow, go step by step with a break between each. If I reread a section it should ideally only tell me one thing, not many. I wouldn’t go much more than 4 lines without a break of some kind (even a line break can be enough).
-
Use headings: Using headings to break up your page into multiple sections can also help with readability. If you have many sections, consider adding a table of contents to the top of the page.
-
Break pages up into sub-pages: Like with above if a page is really long, even if it’s broken up nicely with headings, images, etc. it can still be daunting. Try and break your guide up into a number of sub-pages, each page should generally cover a single part of the procees. If you’ve got one page that takes an hour to read it should probably be split up into a number of smaller ones. Splitting a page into headings or sub-pages can be a bit of a balancing act, you don’t want a million subpages but you also don’t want one page with a million headings, it’s up to your judgement.
-
Don’t rely on links to other documentation: This can vary but generally it’s nicer to keep everything in this one site. For example, when explaining how to install Ruby and Jekyll in Running Locally, for Ruby I linked to their installation docs but also included a callout with the easiest way to install it for Windows so people don’t necessarily need to look through the full (somewhat dense) Ruby installation docs. In the case of Jekyll, their site just tells you to run a single command so instead of linking to it I just included that one command. Duplicating another site’s documentation can be risky, particularly if it’s something that changes often so use your own judgement here.
-
Minimise raw html in markdown: Jekyll supports adding raw html code into your markdown, whilst this can be convenient it also makes stuff harder to maintain. If there is some equivalent supported by a plugin or layout, please use that instead. For example, instead of using html table tags to make a table, use markdown tables.
-
Get someone else to read it: This is probably the most important rule, if other people can’t understand your documenetation then it may as well not exist. Before you finalise some documentation ask at least one other person to read through it and give feedback. You’ll often find that there’s something you’ve unintentionally assumed others know, or some small mistake you’ve made. If possible, get someone unexperienced to actually walk through the whole process, making whatever mod you’re guide is teaching, it might be hard to find someone like that but if you can it will give you some of the most valuable feedback.
Submitting Your Changes
Once you’ve made some changes you’ll need to commit and push them for them to show up in GitHub. How you do this varies slightly depending on whether you’re using GitHub Desktop or VS Code (either will work fine though):
-
In VS Code you can access Git by clicking on the source control tab on the left toolbar (the third option). In here you will see all of the files you’ve changed, to commit them first stage the files you want to by clicking on the
+next to them. Then enter a commit message (like “Add dummy code page”) and click Commit.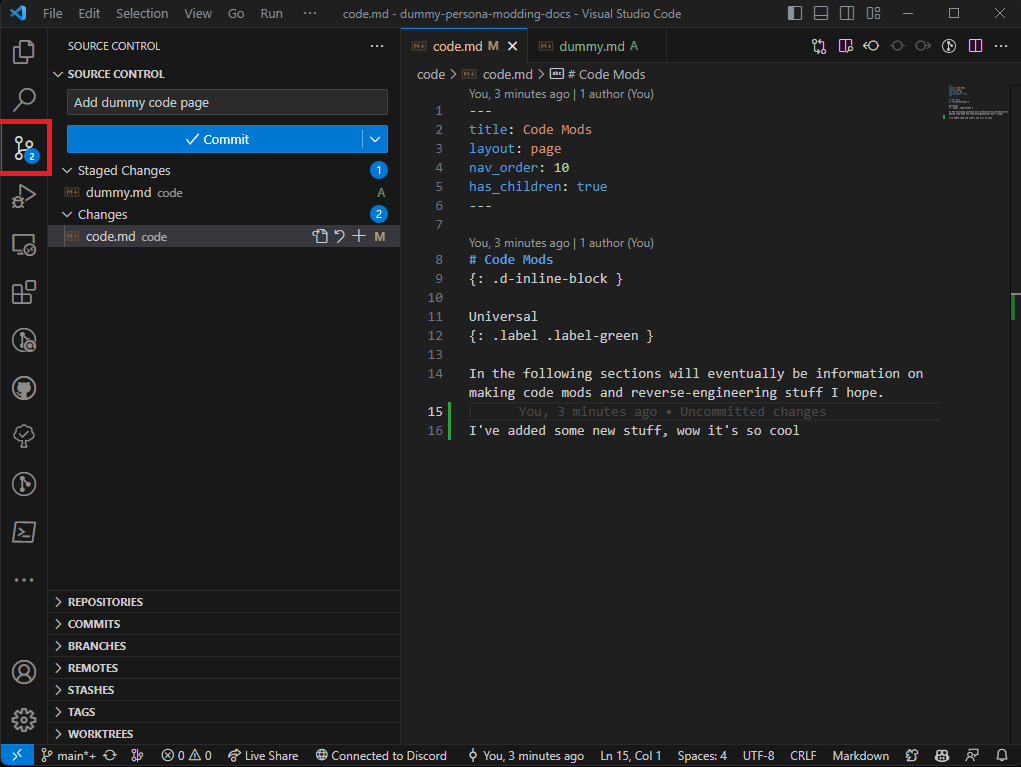
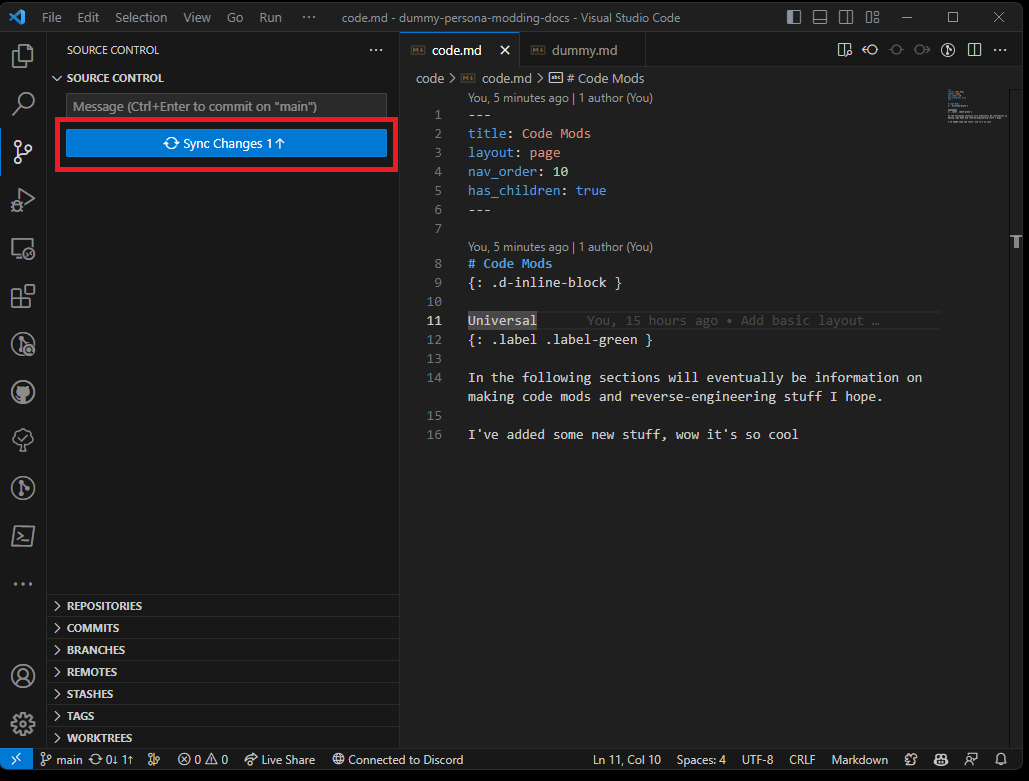
After you’ve commited all of the changes you want to (you can split your changes into multiple commits if you wish) you neeed to push them to GitHub. Click Sync Changes to do so
-
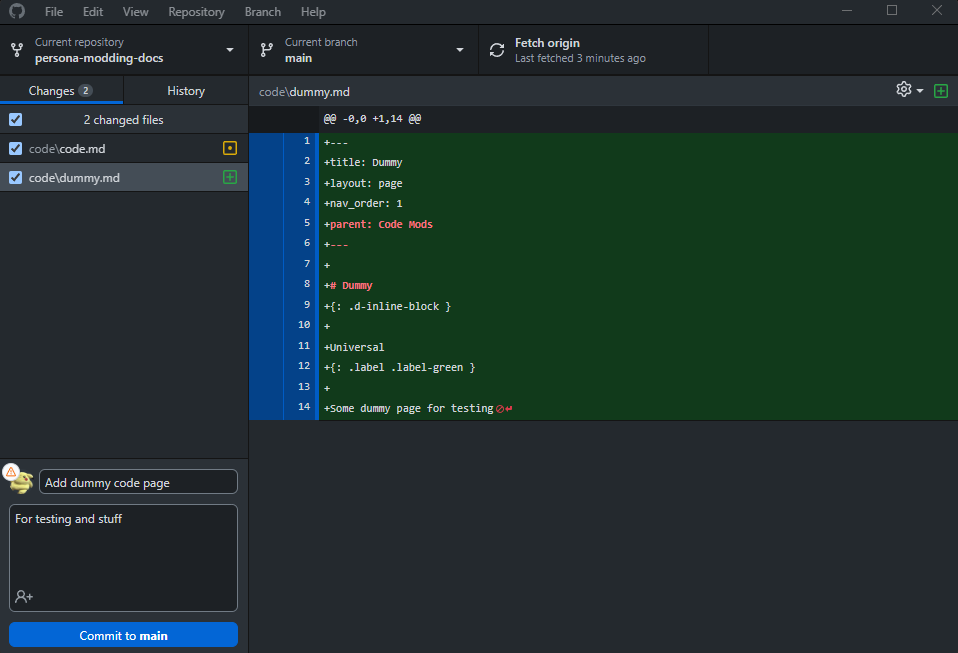
When opening up GitHub Desktop you’ll see all of the changes you’ve made. Tick all of the files you want to commit, enter a summary (like “Add dummy code page”), and if you want to, a more detailed description, then click Commit to main.
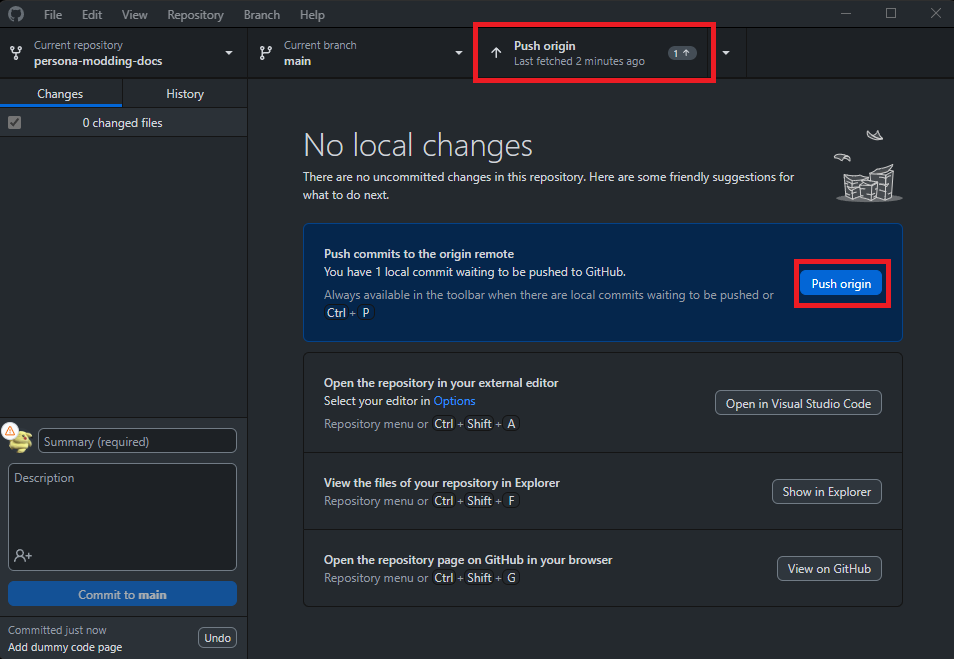
After you’ve commited all of the changes you want to (you can split your changes into multiple commits if you wish) you neeed to push them to GitHub. Click Push origin to do so
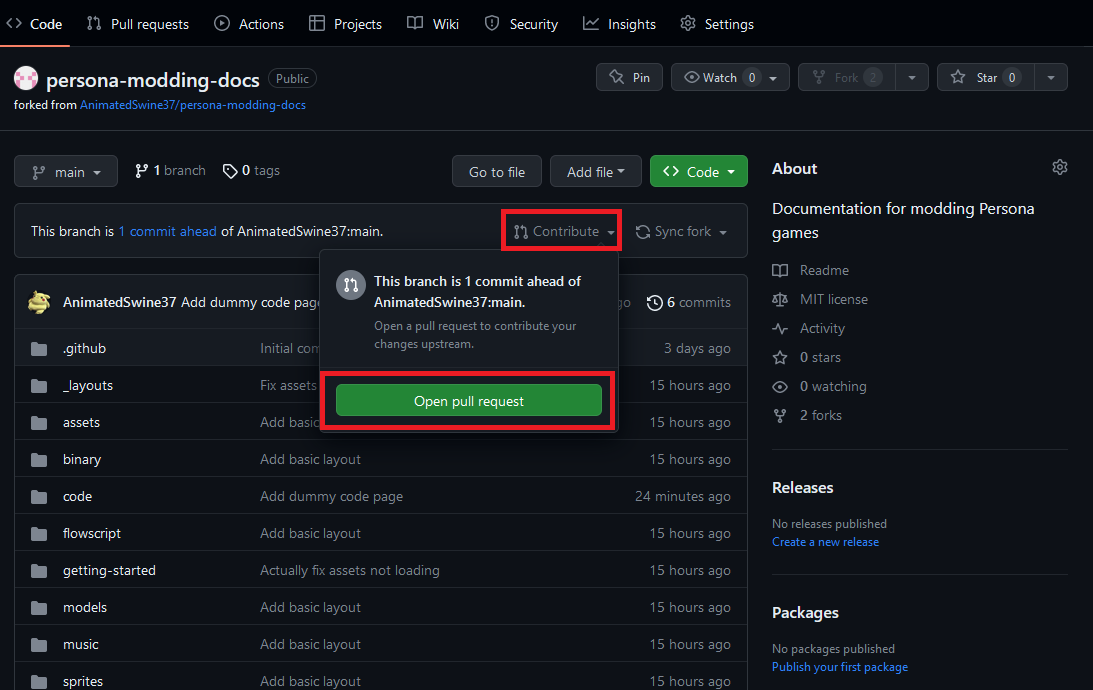
Now that you’ve pushed your changes to GitHub you’ll see that your fork is some number of commits ahead of main (if it also says it is behind some don’t worry, that will be dealt with later).
Assuming that you’re done making changes you can now open a pull request which essentially asks the main repo to add your changes to it. To do so click the Contribute button and then Open pull request.
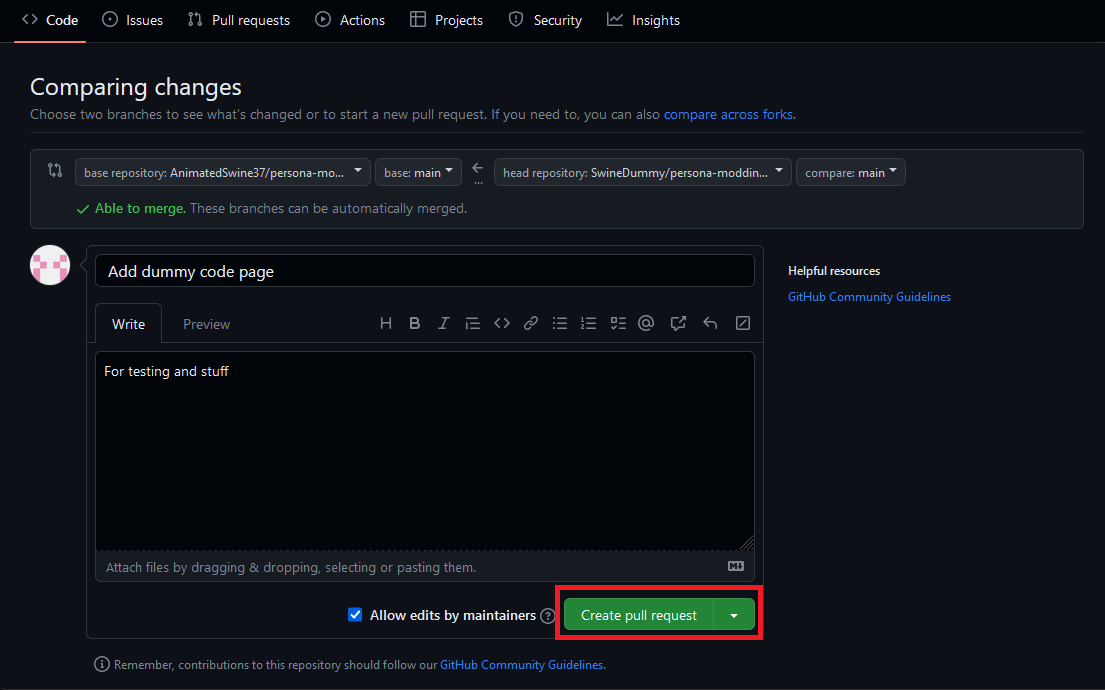
After you do so you’ll be taken to a page where you need to enter some details about your pull request. The title should be a very general overview like “Added a music guide” and the description should be more detailed, if there’s anything important to know about the changes please put it here. After filing the page in click Create pull request and you’re done.
The final thing to do is wait, the pr will be manually reviewed by someone (probably me, AnimatedSwine) and if everything’s good it’ll be merged into main for everyone to see.
If there are problems you may be asked to make changes, if this happens just do the same as before: make changes locally, commit, and push the changes and your pr will automatically update to include them.